18 April 2016

VIDEO | You Are Plane Amazing

Hello there, today I have the pleasure of Guest Designing for Your Next Stamp. I am using the Just Plane Amazing stamp set, along with the Puffy Cloud Border Dies to create a cute little scene.
 

I took a piece of watercolour cardstock and cut this with a MFT Pierced Square Frame Die. I took the inside portion and blended over Distress Inks in Tumbled Glass, Broken China and Salty Ocean. I then spritzed this using the Distress Sprayer to create some texture. I cut the frame die again twice, once from white cardstock and once from vellum. I used the inside pieces again to cut some clouds using the YNS Puffy Cloud Border Dies.
 
 
I took the YNS Just Plane Amazing stamp set and stamped the plane on to some white cardstock, using Memento Tuxedo Black ink. The image was coloured with Copic Markers and fussy cut out. I layered up the pieces on to a 5"x5" card base, adding the frame and plane with foam tape. I stamped the 'flying by to say ...' sentiment on to the larger cloud, again with black ink. To finish off, I added some YNS Gumdrops. I have these enamel dots in white but as I wanted some yellow and blue ones, I coloured them using my Copic Airbrush. I used Y13 for the yellow and B14 for the blue.
 
 
To finish off, I added the second part of the sentiment - ' you are just plane amazing', to the inside of the card.
 
VIDEO:


SUPPLIES:
 
Here are the links to what I have used on the card and in the video. Please click on the picture or wording to be taken to where I purchased it. Affiliate links are used on some products. This means that if you make a purchase after clicking on my link, I receive a small commission with no extra cost to you. I truly appreciate your support when using these links.


COPIC MARKERS: N5, N3, N1, N0, Y19, Y18, Y15, Y13, B0000, 0.
 
For more inspiration on how to use this set, please pop over to the Your Next Stamp Blog. Thank you so much for visiting me today. I hope you have a great day!

16 April 2016

Ranunculus

Hello there, today I have a card to share using the Beautiful Bouquets - Ranunculus stamp set from WPlus9 and it really is beautiful! There are so many colouring mediums I would like to try with this image but for this card, I went with watercolouring.
 
I started off by stamping the image using TH Antique Linen Distress Ink on to a panel of Arches Cold Pressed watercolour paper. I then taped this to a board and painted it using a combination of Winsor & Newton and Daniel Smith (Ultramarine Turquoise and Doipside Genuine from the dot sheets) watercolours. I also added a little Light Blue (036) Zig Clean Color Real Brush pen around the image.


Once the image was dry, I ran it through my Cuttlebug to try and flatten it (it wasn't too warped but a little). I then took the sentiment, from the WPlus9 Wishing You stamp set, and stamped this on to a strip of watercolour paper using black ink. This was then cut out. I added the watercolour panel on to a black A2 card base with ATG and then added the sentiment piece with foam tape. To finish off, I added a few PPP sequins.
 

SUPPLIES:

Here are the links to what I have used on the card. Please click on the picture or wording to be taken to where I purchased it. Affiliate links are used on some products. This means that if you make a purchase after clicking on my link, I receive a small commission with no extra cost to you. I truly appreciate your support when using these links.


Thank you so much for visiting me today. I hope you are all well. Have a great day!

14 April 2016

More Destash

Hello there, I am having another HUGE destash of my pre loved stamps, dies, twine and paper pads over on my For Sale page. There are loads of bargains to be had so please do pop over and have a look if you are interested.
 
All postage costs are based on UK postage. I prefer to sell to people in the UK due to increasing postage costs but if you are international and would love to purchase something, please send me an email for postage quotation (details over on the for sale page). Thanks!

13 April 2016

VIDEO | Experimenting with Distress Crayons

Hello there, if you saw my haul video on Sunday, you will have seen that I bought the Picket Fence Distress Crayon. I had an idea in mind to use it with a stencil and distress ink for a resist technique. While I was there, I got my other Distress Crayons out and had a play too.
 

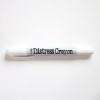
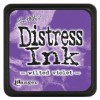
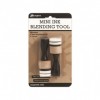
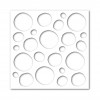
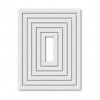
I started with the background pieces first. For the first one, I took a panel of watercolour cardstock and cut it using a SSS Stitched Rectangle die. I added the SSS Irregular Dots Stencil over the top and applied Picket Fence Distress Crayon with an ink blending tool. This was set aside for a few minutes while I worked on the other card. I then applied Wilted Violet Distress Ink on the panel. This created a slight resist effect, with the dots being a lighter colour. The panel was then spritzed with Sparkle Shimmer Spritz.
 

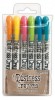
For my second card, I took Mustard Seed and Picked Raspberry Distress Crayons and applied them to a panel of regular white cardstock. I used the same Irregular Dots stencil but this time I wanted the colour just on the dots. The crayons go on with a creamy consistency and blend well, like distress inks. They have a bit more of a soft tone than the inks, though.
 
 
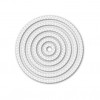
To finished off the card, I took the SSS Painted Thanks die and cut this three times (for each card) from black cardstock. These were then layered up. The panels were added to a black A2 card bases with foam tape. I die cut a SSS Stitched Circle die from vellum and added this, along with the sentiment on to the panels. To finish off, I added some Doodlebug Sprinkles.


VIDEO:
 
Here is a look at how I made the cards and some more thoughts on the crayons and how I used them:


SUPPLIES:
 
Here are the links to what I have used on the cards and in the video. Please click on the picture or wording to be taken to where I purchased it. Affiliate links are used on some products. This means that if you make a purchase after clicking on my link, I receive a small commission with no extra cost to you. I truly appreciate your support when using these links


I don't think these backgrounds are too bad for my first attempt at using the crayons, but I am looking forward to trying some other techniques with them. Have you tried them? Do you like them? I would love to hear your thoughts on them. Thanks so much for visiting me today. I hope you have a great day!
End of code