21 August 2015

VIDEO | Simple Watercolour Painting

Hello there, today I have a card to share that I made for my aunt and uncle for their anniversary. I used a similar layout for a card in the past with ME bunnies. When I saw the WPlus9 Wishing You stamp set, I had the same idea. I saw THIS (fourth card down) card by Dawn Woleslagle and it inspired me to use watercolours for the colouring on the card.
 
 
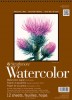
I started off by stamping the bunnies and sentiment on to a piece of Strathmore watercolour paper. This paper has a lovely texture to it. I was worried that the images may not stamp well because of this but they stamped great.  I used Archival ink as this works well with water colouring and it is a nice dark black too.
 
 
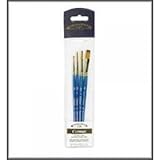
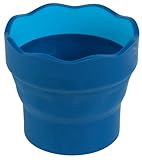
I then painted the image using my Winsor & Newton watercolour paints. I started with a wash of colour first, dried this and then went in with another layer to darken it. I was going for a soft look but I still wanted it to look painted (if that makes sense!). The panel was then simply added to a SSS Fog A2 card base with foam tape.
 
VIDEO:


SUPPLIES:
Here are the links to what I have used on the card. Please click on the picture or wording to be taken to where I purchased it. Affiliate links are used on some products. This means that if you make a purchase after clicking on my link, I receive a small commission with no extra cost to you. I truly appreciate your support when using these links.


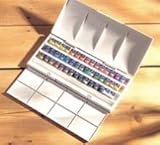
WATERCOLOURS: Hookers Green, Cadium Yellow Pale, Cerulean Blue, Paynes Gray, Chinese White.
 
I am really glad I went with watercolours for the image and not Copic Markers. I do like the soft look. I hope my aunt and uncle like it too! Thank you so much for visiting me today. Hope you have a great day!

20 August 2015

Birthday Bear

Hello there, today I have a card to share using the MFT Birthday Bears stamp set. I love these cute bears in all different poses. Today, I went with a male themed card.


I started off with a panel of white cardstock and stamped the bear with the presents on it. I then masked off his head and stamped the party hat. I stamped the sentiment towards the bottom on the right hand side. The image was  then coloured using Copic markers.
 
 
I added a coating of Glossy Accents to the party hat and the presents and little dots to the bear's cheek with a jelly roll pen. The panel was adhered to an A2 white card base.
 
SUPPLIES:

Here are the links to what I have used on the card. Please click on the picture or wording to be taken to where I purchased it. Affiliate links are used on some products. This means that if you make a purchase after clicking on my link, I receive a small commission with no extra cost to you. I truly appreciate your support when using these links.
 
COPIC MARKERS: Bear: N5, N4, N3, N1, N0, R01, R00. Party hat & bottom present: B97, B95, B93, B91. Middle present: BG49, BG13, BG11. Top present: BG07, BG02, BG01, C1. Ground: W7, W6, W5, W3, W1, W00. Sky: B00, B000, B0000.
 
Such a simple card but I do like how it turned out. Thank you so much for visiting me today. I hope you have an amazing day!

18 August 2015

Happy Birthday Christine!

Hello there, today I am taking part in a blog hop to celebrate Christine's Birthday. Christine is the owner of Create A Smile Stamps and is an amazing designer and card maker. She is also a lovely person too! The design teams were kindly contacted by fellow teamie Anni, to ask if we would like to celebrate Christine's birthday, so of course I said yes. The idea of the hop is to CASE one of Christine's cards and make a new birthday card for her. Here is what I did:
 

I started off by stamping the images from the Botanical Love stamp set with Versamark ink on to some TH Watercolor Cardstock. I then applied WOW! Bright White embossing powder to these and heat set. The images were coloured using Zig Clean Color Real Brush Pens, water and a paint brush.
 
 
Once dried, the panel was added to a white A2 card base. The sentiment, from the Make A Wish set, was stamped with Versamark on to a piece of black cardstock and heat with the same embossing powder. This was added to the card with foam tape. To finish off, I added a few enamel dots and some clear WOS to the flowers.
 

Here is Christine's original card for you to compare. I loved the design as soon as I saw it. I loved the artsy watecrcolour, the colours and the elegance of it. I especially liked the pop of black on the sentiment piece. For my card, I kept the original design because I loved it so much, however, the overall design of mine is more on the clean and simple side (which I cannot help but doing!). The colours I used were a lot brighter and I think this makes it more CAS too. I hope Christine likes it though!


SUPPLIES:
 
Here are the links to what I have used on the card. Please click on the picture or wording to be taken to where I purchased it. Affiliate links are used on some products. This means that if you make a purchase after clicking on my link, I receive a small commission with no extra cost to you. I truly appreciate your support when using these links.


ZIG CLEAN COLOR REAL BRUSH PENS: Large Flowers: Cobalt Blue 31, Blue 30, Turquoise Green 42, Light Green 41. Small Flowers: Yellow 50, Pink 25. Orange Flower: Yellow 50, Orange 70. Leaves: Light Green 41, Pale Green 45. Outside Shadow: Light Blue 36.
 
If you are following the hop, you should have arrived here from the amazing Justine, the next stop on the hop is the super talented Terhi. Thank you so much for visiting me today. I hope you have a great day!

17 August 2015

Clearly Besotted Sentiment Sets Winner

Hello there, I am back to announce the winner of my Clearly Besotted sentiment sets giveaway. Thank you so much for all the entries and your comments. I loved hearing what your favourite sentiment sets are. I have a few that I am off to investigate! Anyway, I drew a winner through Random.org and here is what it chose:
 
 
Comment No. 23 who is Helen J

Helen, please can you email me (link to in the sidebar) with your address and I will get your new goodies out to you soon. Many thanks again to all that entered and continue to support my blog :) Have a great day!

Hugs

Hello there, today I am taking part in The Daily Marker Pop Up Challenge by Kathy Racoosin. If you haven't seen the challenge, it is all about lines. You can draw lines, emboss lines, stamp lines ... anything goes. For my card today, I embossed lines but I also have stitched lines and dotted lines in there too!
 

I started off with a piece of white cardstock that I ran through my Cuttlebug using the SSS Stitched Square die. I then ran this piece through my Cuttlebug again but this time to emboss the LF Puffy Cloud Border die. I added a little blue Copic marker on top of the clouds for some sky and then stamped the sentiment, from the Paper Smooches Chit Chat stamp set, in the bottom right corner.
 
 
I then took the butterfly from the Flap Happy stamp set, stamped it and then cut it out with the matching die. This was coloured using purple Copic Markers and I added a coat of clear WOS too. I added the little dotted line to the panel before adding the butterfly with foam tape. The panel was then adhered to a white 4.25"x4.24" card base with ATG.
 
SUPPLIES:
Here are the links to what I have used on the card. Please click on the picture or wording to be taken to where I purchased it. Affiliate links are used on some products. This means that if you make a purchase after clicking on my link, I receive a small commission with no extra cost to you. I truly appreciate your support when using these links.
COPIC MARKERS: Butterfly: V09, V06, V05, V04, V01. Sky: B000, B0000, Blender.
 
I did do another piece for the challenge by drawing some lines and then colouring in. You can see that over on Instagram. I am hoping I might be bale to make it in to a card soon. Thanks so much for visiting me today. I will be back later with the winner of my Clearly Besotted giveaway. Have a great day!
End of code