Hello there, I am back with another of my Back To Basics episodes. Today I am taking about my 10 basic essential tools for card making. Please scroll down for the video if you do not want to read my post :0)
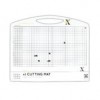
1. Craft Mat or craft surface
It is always best to work on something to stop your desk/table from getting ink on it or messy etc. but I also really like the X-Cut A5 Self Healing Mat because I can cut directly on to it and it is not a problem. It can really take a lot of abuse and it cleans up really well to sticky stuff. I also use the Ranger Craft sheet a lot; mainly for inking projects or when using embossing paste. It is a great surface to use when inking with a blending tool to get a nice soft effect off the edges of the cardstock. It is also great as it repels water and can be cleaned up so easily. Another surface I like, is the Stampin' Up Grid Paper. I often add a sheet of this on top of my craft mat if I know I am going to be stamping off the edge of the cardstock. Although the craft mat can be cleaned (Hero Arts Shadow Inks do stain it though), I find it easier to use the sheet and then I can just recycle them as I go. I can use one sheet for quite a few different cards before I need another.
2. Guillotine or Paper Trimmer
I prefer the guillotine type, I can cut up to five sheets of cardstock, as well as foam, thin chipboard, felt etc. For me it is easy to use and I can line up where I want to cut easily. I have the 13" X-Cut one, which is the same as the one made by Tonic. Even for cutting smaller things I use that one 99% of the time compared to my smaller one.
3. Scoring Board & Bone Folder
I use the Martha Stewart Mini Score board for scoring my cards. It is lightweight and small enough to fit on my desk at all times. Not only is it great for scoring card bases but good for adding embossed lines to your cards and also for making 3D items too. It does come with a scoring tool but I prefer the Teflon Bone Folder from Simon Says Stamp. It is a little bit more pricey than 'normal' bone folders but does not leave that annoying shininess to the cardstock that most of the cheaper ones do. I also really like the shape of it.
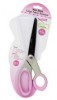
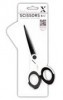
4. Scissors
I have to admit, I have way more scissors than I really need but I like to have a variety! I do have ones for different things. I use the EK Success Cutter Bee scissors for small precise cutting out, like stamped images etc. They are easy to hold and are sharp all the way to the tips. I have a pair of children's' scissors that I got from Tesco to use for sticky things and opening mail only. I also have two pairs of 9.5" X-Cut ones - one I use for paper/cardstock and one I use for ribbon and fabric only. The last pair that I use often are the Tim Holtz Non-Stick scissors, I use these for cutting and mounting my un-mounted stamps.
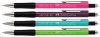
5. Pencils
Not much to say about these really except that a pencil is essential if you want to plan something out, line drawing a line on your card base to be able to line up where you want your sentiment etc. I like the mechanical type.
6. Craft Knife
I do not use my craft knife that much as I use my guillotine when cutting straight lines but it is handy to have one. I often use mine if a die hasn't cut all the way through the cardstock or when cutting gems away from the packaging sheet.
7. Pokey Tool/Piercing Tool
I love these babies! I use mine for adding gems, pearls, enamel dots etc. to my cards. I also use them for piercing holes into cardstock. I definitely think they are a must have.
8. Ruler
Again, I think a ruler is must have. I like the Tim Holtz one as it is plastic, so it is see through but has a metal rim on one side so can be used with a craft knife if necessary. I also like that you can centre something quite easily with it. Plus it has piercing holes too. I also like the T-Square rulers, these are handy for making sure something is completely straight.
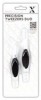
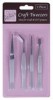
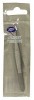
9. Tweezers
I use these all the time. I have a few different pairs but I use them for taking the backing off of foam pads, double sided tape etc. I also use them for placing things on my card, like an embellishment or cut out stamped image.
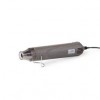
10. Heat Tool
Last but not least is the heat tool/gun. It is pretty necessary if you are heat embossing but it is also great for speeding up the drying time of inks or watercolouring. I have the one from Stampin' Up and I like it but you do need to have it on for a minute or two before using it on your project or it will warp the cardstock.
Here is the video:
PRODUCTS MENTIONED:
I hope that helps some of you or that you found it enjoyable/interesting to watch. Thanks so much for visiting me today, hope you have a great rest of your weekend.