Showing posts with label Stampin Up. Show all posts

3 October 2016

40

Hello there, today I have something to share that doesn't happen very often ... a card with no stamping on! The card is entirely made up of die cutting and embossing. I did stamp a sentiment on the inside though! ;)
 

I started off by taking a piece of white cardstock and ran this through my Cuttlebug using the PTI Sunrise Impressions 1 Impression Plate. I then die cut the MFT High Rise numbers from Stampin' Up Silver Glimmer Paper. I cut these from foam sheet too. I took the Mama Elephant Confetti dies and cut these also with the glimmer paper.
 
 
I adhered the embossed piece on to an A2 white card base with ATG. I then layered up the glimmer 4 and 0 on to the foam ones (to give some dimension) with Multi Medium Matte. These were added to the sun part of the embossed background. To finish, I added the little sequin and star pieces.
 
SUPPLIES:
Here are the links to what I have used on the card. Please click on the picture or wording to be taken to where I purchased it. Affiliate links are used on some products. This means that if you make a purchase after clicking on my link, I receive a small commission with no extra cost to you. I truly appreciate your support when using these links.

Such a simple design but I think the glitter gives it that extra touch. My camera never enjoys the glitter though, so I apologise for the photos! Thank you for visiting me today. I hope you have a great week!

14 August 2015

Hello Friend

Hello there, I am back with the card I made for the Online Card Classes Background Check background from day five (sorry I am out of day order here, I still have day four to share). The background for this piece was inspired by a technique used by Kristina Werner, of adding colour over textured pieces.
 

I started off by running a piece of white cardstock through my Cuttlebug using the Manhattan Flower Embossing Folder from Stampin' Up (unfortunately this has now been discontinued, sorry). I then blended TH Distress Inks in Milled Lavender and Seedless Preserves on to it. I finished the piece off by misting it with Tattered Angels Glimmer Mist.
 
 
For the finished card I went with a similar design that Jennifer McGuire shared on day three. First, I cut a small piece of the panel out. The top piece was adhered to a white A2 card base. I then added a strip of white cardstock below it and then the bottom piece of the background was added. This inlayed technique means the card continues to be one layer. The 'friend' sentiment, from the WPlus9 Hand Lettered Hello set, was stamped on to the white piece with black ink. I then die cut the hello die with black cardstock and added this to the left.
 

SUPPLIES:

Here are the links to what I have used on the card. Please click on the picture or wording to be taken to where I purchased it. Affiliate links are used on some products. This means that if you make a purchase after clicking on my link, I receive a small commission with no extra cost to you. I truly appreciate your support when using these links.

+ Stampin' Up! Manhattan Flower Embossing Folder - discontinued.

I usually add WOS or Glossy Accents to my word die cuts, but since the background piece is already quite shimmery, I decided to leave it bare cardstock. Thank you so much for visiting me today. I hope you have a great day!

1 August 2015

Background Check | Homework Part Two

Hello there, I am back today to share more of my homework from the Online Card Classes Background Check class. I am really enjoying the class and creating lots of different backgrounds.


Day four (Thursday) shared die cutting techniques. For my homework I decided to use a technique by the amazingly talented and funny Laura Bassen. She shared how to use the negative part of a cover plate to make a background. I chose the PTI Hexagon cover plate. I added the hexagons to a white A2 card base with foam dots and coloured the hexagons using Copic Markers.

 
Day five (yesterday) shared adding texture to backgrounds. For my homework, I decided to use a technique by Kristina Werner that uses ink blending with dry embossing. I ran a piece of white cardstock through my Cuttlebug with the SU & Sizzix Manhattan Flower embossing folder (which has sadly been discontinued). I then blended over Distress Inks in Milled Lavender and Seedless Preserves. To add some final pizzazz, I sprayed the piece with shimmer spray.

I am really looking forward to making these into cards. I will share them with you shortly but first, I have the new Clearly Besotted release to share with you. The teasers start tomorrow but please pop over and see Stephanie today, for the initial sneak peek. It's a great release, you are going to love it! Thank you for visiting me today, have a great day and an amazing weekend!

1 June 2015

Happy Birthday Butterfly

Hello there. Today is Maggie's (IG username @Rahzicrafts) Birthday and a few of the ladies on IG decided to make birthday cards for her as a little surprise. My card uses the gorgeous Stampin' Up Swallowtail stamp. I see Maggie has a happy, fun person who is always so kind in leaving me nice comments on IG, so I wanted to colour the butterfly in bright colours.
 

This also gave me an excuse to bust out my new Zig Clean Color Real Brush pens as part of the new 30 Day Colouring Challenge by Kathy Racoosin. I started off by stamping the Swallowtail on to some TH Watercolour Paper, using Arhival ink. I then coloured the butterfly using pink, orange and yellow pens for the wings and browns for the body, mixing/blending them with water and a paint brush. I also went around the outside with a pale blue.
 
 
The sentiment, from the ME Woodland Gifts stamp set, was stamped with Versamrk ink on to some black cardstock. I applied white embossing powder over the top and heat set. This was then cut out and added to the panel with foam tape. The panel was adhered to a black A2 card base with ATG.  I finished off the card by adding a few Doodlebug Glitter Sprinkles around the sentiment and some Clear Wink Of Stella on the butterfly.
SUPPLIES:
Here are the links to what I have used on the card. Please click the picture to be taken to where I purchased it.

ZIG CLEAN COLOR REAL BRUSH PENS: 25 Pink, 70 Orange, 50 Yellow, 64 Oatmeal, 94 Gray Brown, 36 Light Blue.
 
If you see this Maggie, I hope you have a great Birthday! Before I go, I wanted to mention about the new Stampin' Up! Catalogue that will be going live tomorrow, 2nd June 2015.
 
 
I always love having a look to see what is new in the catalogue. The card tin on page 152 has caught my eye. Not necessarily for storing cards in, but it would look lovely on my shelf and I can store other bits in it. I am always on the look out for cute storage! I have also seen that they are now carrying thicker weight Whisper White cardstock. When I get a moment, I will be ordering some to see how I like it. I have to admit, I hate the thinner stuff so hopefully this will be better. I also saw on page 156, that there is a new adhesive called the Fast Fuse. This looks very much like Tombow Xtreme adhesive to me, and if it is, that is great because it is very difficult to get hold of here in the UK!
 
If you are looking for a Stampin' Up! demonstrator, I can highly recommend mine, Julie Kettlewell. She is such a nice person and is always wiling to help. If you need a catalogue, please contact her through her blog, I am sure she will be happy to provide you with one.
 
Many thanks for visiting me today. I will be back later with the winner of my Birthday Giveaway! Have a great day!

15 April 2015

VIDEO | I'm Here For You

Hello there, sorry I haven't been around much recently. I was focussing on trying to sell some of my stash. A big thanks goes to everyone that has bought something from me :) Anyway, I back today to share a card and video as part of the Create A Smile Video Design Team.
 
 (Apologies for the poor photos, you will not believe how many I took! I love adding a little glitter to my cards but I think it reflects badly and I always seem to struggle when taking photos of it sadly).
 
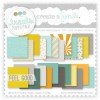
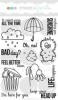
I started off by taking the large flower image from the Botanical Love set, stamped this with Versamark and heat embossed in white. This was coloured with Copic Markers, from the back of the vellum and cut out. The sentiment, from the Bad Day set was stamped on to a piece of paper from the Feel Good paper collection and cut in to a strip.
 
 
I then cut the strip at an angle, as well as a piece of Stampin' Up! Silver Glimmer Paper and attached these together with the TH Tiny Attacher. These were added to the vellum flower with clear foam tape. The flower was then added to a white cardstock panel with Multi Medium Matte. The panel was adhered to a 4 Bar card base with foam tape and I added a few PPP Sparkling Clear sequins to finish.
 
VIDEO:


SUPPLIES:
Here are the links to what I have used on the card and in the video. Please click the picture to be taken to where I purchased it.

COPIC MARKERS: BG57, BG53, B000.
 
Thanks so much for visiting me today. I hope you are all well and enjoying the sunshine! (if you have it where you are, it has been lovely and sunny here in London the last few days!). Have a great day!
End of code