19 November 2016

VIDEO | Sparkly Snowflakes

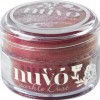
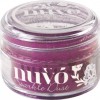
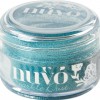
Hello there, today I have a trio of cards that I made using the new Tonic Nuvo Sparkle Dust. Tonic Studios kindly sent me some of these to use and I have to say, I love them! They are really super fine glitter, hence why they are called a dust and not a glitter. They do not feel gritty like glitter but soft and silky like.


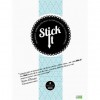
I started off by adding some Stick It adhesive sheet to some scraps of white cardstock. I removed the top film off of the Stick It and then applied the Sparkle Dust on top. Once it was adhered, I ran my finger over it to push the dust into the adhesive and then ran my bone folder over it. It's really difficult to capture the sparkle in photos or on camera but let me tell you, this stuff is gorgeous!
 
 
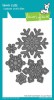
I used three shades of Sparkle Dust for my cards today - Paradise Blue, Cosmo Berry and Raspberry Bliss. The pieces were run through my Cuttlebug using one of the dies from the Lawn Fawn Stitched Snowflake die collection. Since the Sparkle Dust is so fine, you can still see the stitching detail on the die cuts which I love.


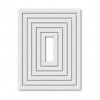
Whilst die cutting, I also embossed a SSS Stitched Frame die on to A2 white card bases. If you are not sure how to emboss with dies. You see my video about it here.
 
 
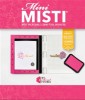
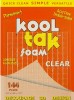
The sentiment, from the SSS Arctic Christmas stamp set, was stamped on to each of the card bases using my Mini MISTI. The snowflakes were then adhered to the card with thin strips of clear foam tape.
 
VIDEO:
 I apologise that the lighting isn't great in the video, but here is a look at how I made the cards:


SUPPLIES:
Here are the links to what I have used on the card. Please click on the picture or wording to be taken to where I purchased it. Affiliate links are used on some products. This means that if you make a purchase after clicking on my link, I receive a small commission with no extra cost to you. I truly appreciate your support when using these links. Products marked with an asterisk (*) were sent to me, all other products were purchased by myself.
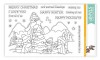
I love how these came out. Clean and simple but I like the added shimmer that the Sparkle Dust gives. You could make them in lots of different colours too! Sadly the photos haven't done the glitter any justice but honestly, it is really sparkly in real life! Thank you so much for visiting me today. I hope you have a great weekend.

18 November 2016

Pix's Bauble

Hello there, today I have a card to share inspired by the colouring of Maxx Stephen. I found him via Stephanie Klauck who has been doing some amazingly stunning colouring with pencils recently. One of the things that caught my eye was creating a sparkly effect with Spica glitter pens and a white gel pen. I thought I would have a go myself.
 

I started off by taking a piece of white cardstock and stamping the bunny with the bauble from the Mama Elephant Pix's Happy Holiday stamp set. I then stamped the sentiment, from the Mama Elephant Mini Messages set above. The image was coloured with Copic Markers (colours used listed below the supplies section). I then added dots of glitter using two shades of pink Copic Spica pens. I also added dots using a white Sakura Gelly Roll pen. I also add some dots to the ribbon on the bauble with purples.
 

I decided to make a square card so I cut the panel down using a SSS Stitched Square die. I took a white 4x4" white card base and added a sheet of paper from the Doodlebug Frosty Friends paper pad (sadly now discontinued). The image panel was then adhered on top with foam tape. To finish off, I added black glaze pen to Pix's eyes.
 
SUPPLIES:
Here are the links to what I have used on the card. Please click on the picture or wording to be taken to where I purchased it. Affiliate links are used on some products. This means that if you make a purchase after clicking on my link, I receive a small commission with no extra cost to you. I truly appreciate your support when using these links.


COPIC MARKERS: Pix - N5, N3, N1, N0. Hat & Clothing - V17. V15, V12, C2, C1. Bauble - RV66, RV63, RV00, RV000, Spica 14 Blossom, Spica 02 Pink. Bow - V17, V15, V12, Spica 13 Lilac, Spica 01 Lavender.
 
I need a lot more practice with the technique but I do like how it came out. Thank you so much for visiting me today. I hope you have a great weekend!

16 November 2016

VIDEO | Card Making Haul October & November 2016

Hello there, I am here today to share what I bought in October and at the beginning of November. I am probably not going to be buying much more this month so I thought it was better to combine the months together.
 
 
This month is mainly all about the stamps! There have been so many great releases recently and I am really looking forward to get playing with it all! Here is a look at what I got:


SUPPLIES:
Here are the links to what I shared in the video. Please click on the picture or wording to be taken to where I purchased it. Affiliate links are used on some products. This means that if you make a purchase after clicking on my link, I receive a small commission with no extra cost to you. I truly appreciate your support when using these links.


Thank you so much for visiting me today. I apologise that I haven't had many cards to share recently. I have been creating behind the scenes but I cannot show you that just yet sadly! I hope you are doing well and I hope you have a great rest of the week.

14 November 2016

Dashing Through The Snow

Hello there, today I have another card to share using the new Snow Day release from Purple Onion Designs. Today I am using Dash the penguin. Isn't he cute?
 

I started off by stamping Dash on to a piece of cardstock with black ink and then coloured hi with Copics (colours used are listed under the supplies section). He was then fussy cut out using scissors. I took an MFT Snow Drifts die and cut this from mask paper. This was added to the bottom of a white A2 card base. I softly applied Tumbled Glass Distress Ink on to the top of it, to look like a snow bank with a place blue background. I took the mask and added it to a white CB tag too (sadly now discontinued) and did the same thing, so that it matched up with the card base.
 
 
I tied Ladybug Doodlebug Twine around the top of the tag and placed it on to the card base with foam tape. Dash was then added on top with foam tape also. The sentiment was stamped on to white cardstock and cut out with scissors. It was added to the card base with more foam tape. To finish, I added red Spica pen to Dash's scarf.
 

SUPPLIES:

Here are the links to what I have used on the card. Please click on the picture or wording to be taken to where I purchased it. Affiliate links are used on some products. This means that if you make a purchase after clicking on my link, I receive a small commission with no extra cost to you. I truly appreciate your support when using these links.


COPIC MARKERS - Dash: BV29, BV25, BV23, Y11, Y0000, YR16, YR15, YR21, Y13. Scarf: R89, R37, R29, R27, R14. Sled: C5, C3, C2, C1, C00.
 
When I made the card, I didn't actually realise the penguin was called Dash! It's great how these little things turn out sometimes :) You can see more inspiration using the new Snow Day collection over on the Purple Onion Designs Blog. Thank you so much for visiting me today. I hope you have a great day!
End of code