Pages

26 July 2024

Spellbinders | Birthday Wishes

Hello there, today I have two cards to share with you using the Spellbinders Birthday Bash Collection by Simon Hurley, which is out now. This is such a fun collection! My cards focus on the Party Balloons 3D Embossing Folder, which can be purchased with or without the coordinating stencil. 

PLEASE NOTE: This post contains affiliate links. Please see below for my full disclosure.


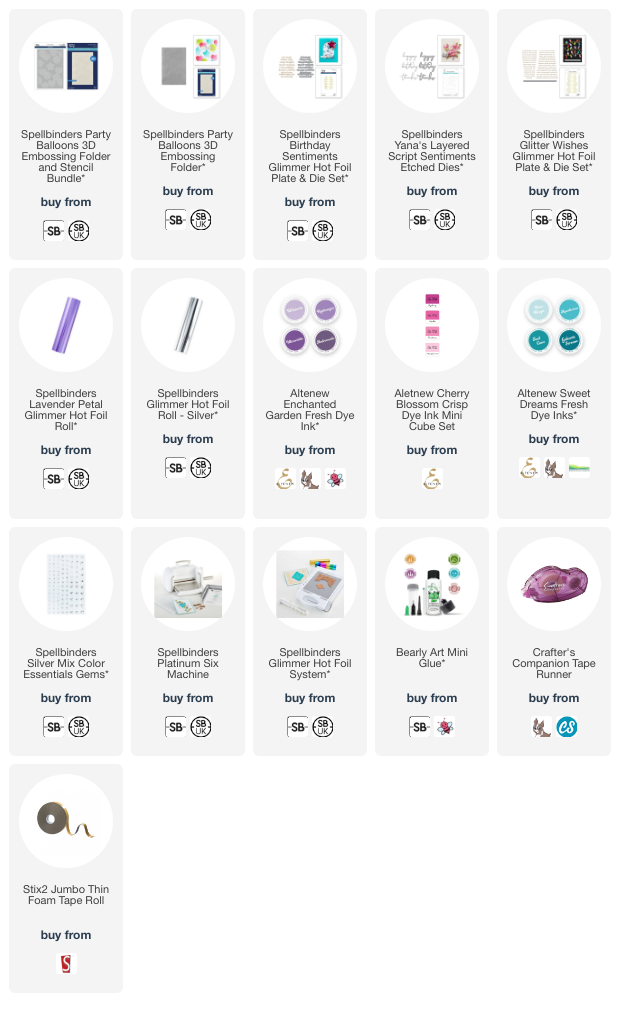
My first card uses the embossing folder and stencil. I started off by placing a panel of white cardstock inside the Spellbinders Party Balloons 3D Embossing Folder and ran it through my Platinum Six. I then placed the Spellbinders Party Balloons Stencils on top, one by one, to add colour to the balloons. 


I used Altenew Enchanted Garden Fresh Dye Inks for the star balloons, Altenew Cherry Blossom Crisp Dye Inks for the heart balloons, and Altenew Sweet Dreams Fresh Dye Inks for the circle balloons. There is a stencil to add highlights to the balloons but I didn't use it on my card today. The panel was then adhered to a US A2 sized white card base with tape runner adhesive. 


I took the Spellbinders Birthday Sentiments Glimmer Hot Foil Plate & Die Set (lots of sentiments on one plate) and hot foiled it onto white cardstock with Spellbinders Lavender Petal Foil. I die cut it out using the coordinating die. I then die cut the die another two times from white cardstock so that I could adhere the die cuts behind the sentiment for added dimension. I adhered the one that says 'may all your wishes come true' to the card using Bearly Art Glue. 


For my second card, I started off by taking a panel of white cardstock and added ink blending on top using ink blending brushes. I added Altenew Enchanted Garden Fresh Dye Inks at the bottom and Altenew Cherry Blossom Crisp Dye Inks at the top. I placed it inside the Spellbinders Party Balloons 3D Embossing Folder and ran it through my Platinum Six Die Cutting Machine.


It was adhered to a US A2 sized white card base with thin foam tape. I then die cut the birthday word from Spellbinders Yana's Layered Script Sentiments Etched Dies Set. I cut the word itself from black cardstock twice and the shadow from white cardstock twice. They were layered up and adhered using Bearly Art Glue, before adhering to the card. 


I took a sentiment from the Spellbinders Glitter Wishes Glimmer Hot Foil Plate & Die Set and hot foiled it onto white cardstock using Spellbinders Silver Foil. It was cut into a strip and then cut down so that I just had the 'wishes' part, which was adhered to the card with foam tape. To finish off, I added a few Spellbinders Silver Mix Color Essentials Gems

SUPPLIES:


Here are the links to what I have used on the projects. Affiliate links are used on some products. This means that if you make a purchase after clicking on my link, I receive a small commission with no extra cost to you. I truly appreciate your support when using these links. Please click on the logo below the product to shop at your favourite store. All products were personally purchased except those from Clearly Besotted, Hero Arts or those marked with an asterisk (*) which were kindly sent to me to use. You can read my full disclosure here.


I hope you will check out the collection, it is a fun one! Thank you so much for stopping by today, I really do appreciate it. I hope you have a wonderful day and a great weekend! 

25 July 2024

Simon Says Stamp | You Are the Best

Hello there, I hope you are well. Today I have a card to share using two new products from the Simon Says Stamp Cheering for You release, which is out now! They kindly sent me the Simon + CZ Design You Stamp Set, as well as A2 Clear Acetate Cards to play with and this is what I made with them ...

PLEASE NOTE: This post contains affiliate links. Please see below for my full disclosure.


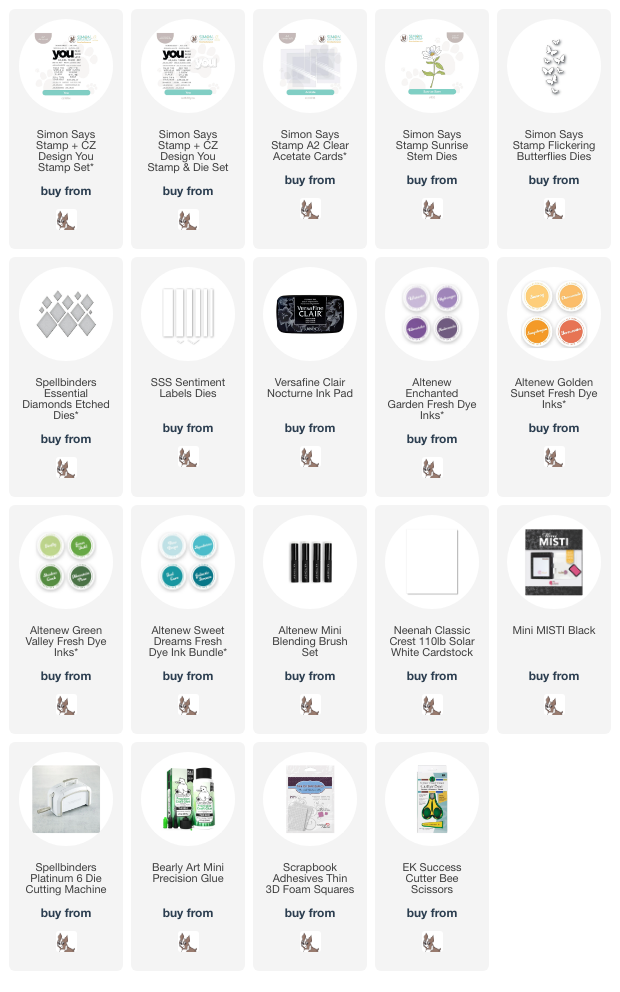
I started off my card by stamping the large 'you' word from the Simon Says Stamp + CZ Design You Stamp Set onto white cardstock with Versafine Onyx Black Ink. I then stamped the accompanying 'are the best' sentiment using the same ink. I set them aside to dry whilst I worked on the flower. 


I die cut the Simon Says Stamp Sunrise Stem Dies from white cardstock and using blending brushes, blended ink on top. I used Altenew Enchanted Garden Fresh Dye Inks for the petals, Altenew Golden Sunset Fresh Dye Inks for the flower centre and Altenew Green Valley Fresh Dye Inks for the leaves and stem. I also cut another layer from white cardstock and adhered them behind the inked ones, for a little stability and also dimension. 


I die cut a Spellbinders Essential Diamond Etched Die from white cardstock and adhered it onto a Simon Says Stamp A2 Clear Acetate Card using thin foam tape. The flower was then adhered on top using Bearly Art Glue. I made sure not to add glue where it overlapped onto the acetate card (so that you wouldn't see the glue from the inside). I then die cut the Simon Says Stamp Flickering Butterflies Dies from white cardstock and added ink blending on top with Altenew Sweet Dream Fresh Dye Inks


I fussy cut the 'you' using scissors (there is a coordinating die available) and adhered it onto the card with thin foam squares. I then cut the accompanying sentiment into a strip using the Simon Says Stamp Sentiment Labels Dies and popped that below the 'you'. I adhered the butterflies to the card and to finish, embellished with Spellbinders Teal Color Essentials Gems. Since the card is clear, I did add more diamond panels to the inside of the card and also the back (to give somewhere to write a personal message and also to hide the adhesive). 

SUPPLIES:


Here are the links to what I have used on the project. Affiliate links are used on some products. This means that if you make a purchase after clicking on my link, I receive a small commission with no extra cost to you. I truly appreciate your support when using these links. Please click on the logo below the product to shop at your favourite store. All products were personally purchased except those from Clearly Besotted, Hero Arts or those marked with an asterisk (*) which were kindly sent to me to use. You can read my full disclosure here.


I wanted to mention that the clear acetate cards are excellent quality. Really sturdy not a scratch in sight! They are a little tricky to photograph though, just like any acetate, so I apologise for any reflections. Thank you so much for stopping by today, I really do appreciate it. I hope you have an excellent day. Take care! 

23 July 2024

Spellbinders | Copperplate Holiday Sentiments

Hello there, I am delighted to be over on the Spellbinders Blog today sharing three cards using the new Copperplate Holiday Sentiments Collection. These beautiful plates are large enough to take centre stage on a card, so not much else is needed, which I really love!

PLEASE NOTE: This post contains affiliate links. Please see below for my full disclosure.

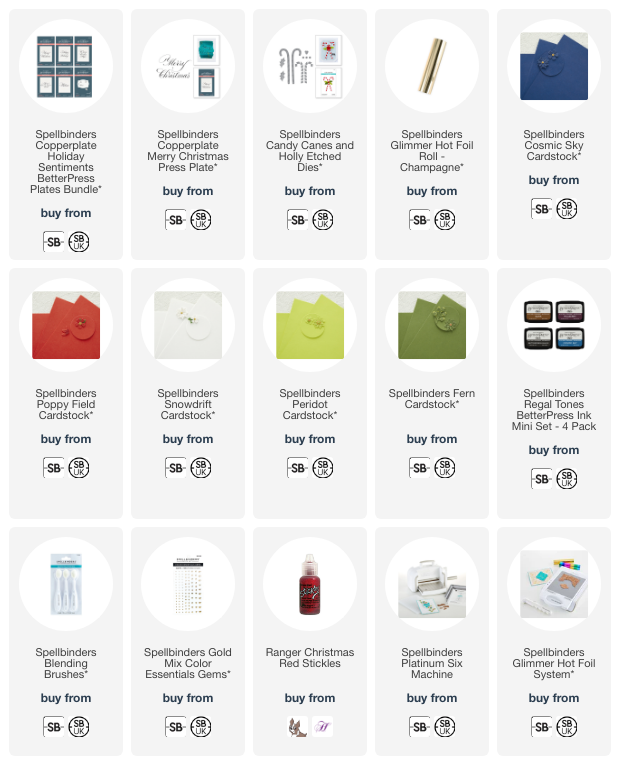
Here is a peek of one of my cards, I used the Spellbinders Copperplate Merry Christmas Press Plate

I hot foiled it onto a panel of Spellbinders Cosmic Sky Cardstock using Spellbinders Champagne Foil. I added ink blending around the edges with Spellbinders BetterPress Inks and adhered to a mini slimline (3.5" x 6") card base. The Spellbinders Candy Canes and Holly Etched Dies were die cut, assembled and adhered to the card with thin foam tape. 

Please head over to the Spellbinders Blog for more information on how I made the card and to see the others that I made too! 

SUPPLIES:


Here are the links to what I have used on the project. Affiliate links are used on some products. This means that if you make a purchase after clicking on my link, I receive a small commission with no extra cost to you. I truly appreciate your support when using these links. Please click on the logo below the product to shop at your favourite store. All products were personally purchased except those from Clearly Besotted, Hero Arts or those marked with an asterisk (*) which were kindly sent to me to use. You can read my full disclosure here.


I really love the elegant handwritten font on these sentiments. Although these are press plates, as you can see from my card, you can foil with them too! Thank you so much for stopping by today, I really do appreciate it. I hope you have a wonderful day! 

22 July 2024

VIDEO | Debossing with Dies

Hello there, today I have a card and video to share using dies for dry embossing/debossing. This is one of my favourite techniques to do as it gives a different look from actually cutting the die and you can use both the 'negative and positive' of the die this way too! 

PLEASE NOTE: This post contains affiliate links. Please see below for my full disclosure.


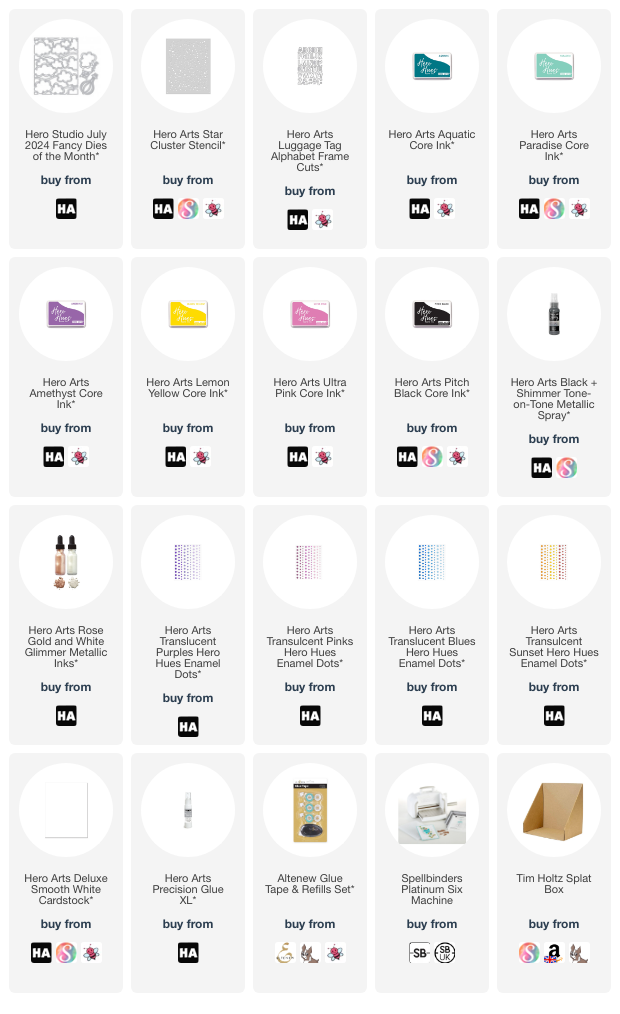
I started off my card by taking a panel of Hero Arts Deluxe Smooth White Cardstock and added ink blending to it using Hero Arts Core Inks. I added a blob each of Lemon Yellow, Ultra Pink, Aquatic, Paradise and Amethyst. I then filled in the gaps with Pitch Black


I placed the Hero Arts Star Cluster Stencil on top and randomly added ink blending through it to add some extra interest to the background. I placed the Hero Studio July 2024 Fancy Dies of the Month background die on top and ran it through my die cutting machine with an embossing/rubber mat so that it didn't cut but embossed. 


I sprayed on a little Hero Arts Black + Shimmer Tone-on-Tone Metallic Spray and then splattered on Hero Arts White Glimmer Metallic Ink before setting it aside to dry. Once dry, it was adhered to a white card base with tape runner adhesive. I die cut the letters to spell 'dream big' from the Hero Arts Luggage Tag Alphabet Fancy Dies set each five times and adhered them one on top of another for some added dimension. 


They were adhered to the card and then to finish, I embellished with Hero Hues Transparent Blues, Transparent Purples, Transparent Pinks and Transparent Sunset Enamel Dots. 

VIDEO:

Here is the video showing how I made the card:


If you are viewing this blog post via email subscription, you can watch the video HERE on YouTube. 

SUPPLIES:


Here are the links to what I have used on the project. Affiliate links are used on some products. This means that if you make a purchase after clicking on my link, I receive a small commission with no extra cost to you. I truly appreciate your support when using these links. Please click on the logo below the product to shop at your favourite store. All products were personally purchased except those from Clearly Besotted, Hero Arts or those marked with an asterisk (*) which were kindly sent to me to use. You can read my full disclosure here.


I really like how the cloud background looks embossed. If you want to see what it looks like die cut, please see my other card using this set HERE. Thank you so much for stopping by today, I really do appreciate it. I hope you have a wonderful week ahead! 

20 July 2024

Spellbinders | Nichol's Needlework Collection

Hello there, I am delighted to be over on the Spellbinders Blog, sharing three projects using Nichol's Needlework Collection. This is such a great collection as not only can you use the dies in different ways - with or without the needlework/sewing theme, you can also use them for all occasions too!  

Over on the blog I am sharing a Christmas card, an everyday card and as seen in the peek below, a Halloween tag. 

PLEASE NOTE: This post contains affiliate links. Please see below for my full disclosure.


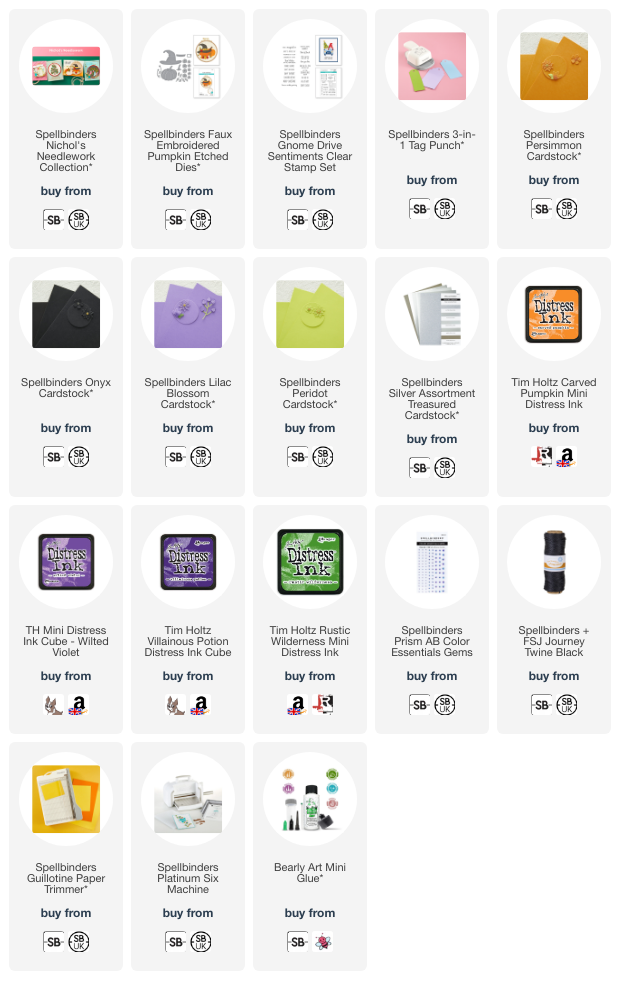
This project doesn't use the needlework aspect of the collection, but I thought the pumpkin with the witches hat on would be fun to add a to tag to put on a sweet treat bag at Halloween. I cut the dies from the Faux Embroidered Pumpkin Etched Dies set using Spellbinders Cardstock. I added ink blending around the edges and assembled with Bearly Art Glue. 

I created a tag using the 3-in-1 Tag Punch and stamped a sentiment on top from the Gnome Drive Sentiments Clear Stamp Set. I adhered the pumpkin, hat, flowers and leaves on top. To finish, I embellished with Prism AB Color Essentials Gems

SUPPLIES:


Here are the links to what I have used on the project. Affiliate links are used on some products. This means that if you make a purchase after clicking on my link, I receive a small commission with no extra cost to you. I truly appreciate your support when using these links. Please click on the logo below the product to shop at your favourite store. All products were personally purchased except those from Clearly Besotted, Hero Arts or those marked with an asterisk (*) which were kindly sent to me to use. You can read my full disclosure here.


For more details on how I made the tag, as well as the cards I made too, please head over to the Spellbinders Blog. Thank you so much for stopping by, it is very much appreciated. I hope you have a wonderful weekend! 

16 July 2024

Spellbinders | Snowcapped Holidays

Hello there, I hope you are well. I am here today to share a card that I made using the Spellbinders July 2024 Large Die of the Month Club Kit called "Snowcapped Holidays". The set features a beautiful snow-capped birdhouse, two birds, foliage and flowers and also a branch for the house to hang from (I didn't use that part today). 

PLEASE NOTE: This post contains affiliate links. Please see below for my full disclosure.


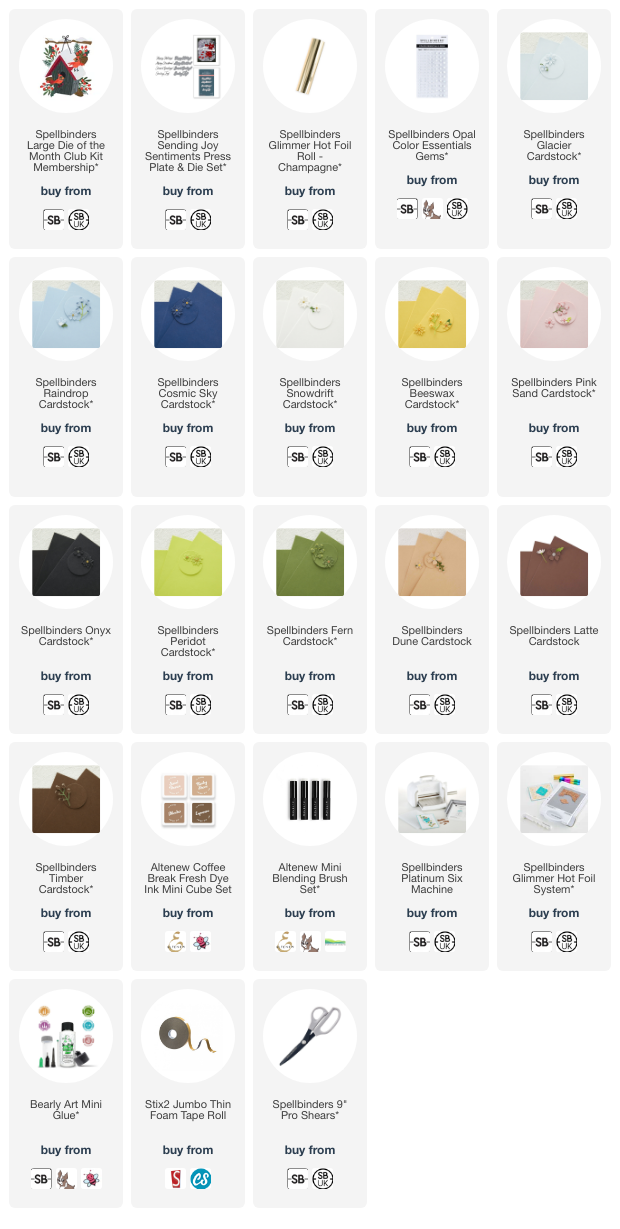
I started off by die cutting the birdhouse from the Spellbinders July 2024 Large Die of the Month Club Kit from Spellbinders Dune, Latte and Timber Cardstock. the snow was cut from Spellbinders Snowdrift Cardstock. I added ink blending to the main portion using Altenew Coffee Break Fresh Dye Inks. The house was then assembled and adhered using Bearly Art Glue. 


I die cut the birds from Spellbinders Glacier, Raindrop, Cosmic Sky, Snowdrift, Onyx, Beeswax and Pink Sand Cardstock. They were assembled and adhered using Bearly Art Glue. I then cut the foliage from Spellbinders Peridot and Fern Cardstock. The flowers were cut from Spellbinders Cosmic Sky Cardstock


Using the birdhouse as a guide, I adhered the foliage and flowers to a US A2 sized card base with Bearly Art Glue. The birdhouse was then adhered on top using thin foam tape. The perching bird was adhered with thin foam tape. I hot foiled the Spellbinders Sending Joy Sentiments Press Plate & Die Set onto white cardstock using Spellbinders Champagne Foil


It was die cut out using the coordinating die and adhered to the card with thin foam tape. I then popped the second bird behind, as well as two holly leaves. To finish off, I embellished with Spellbinders Opal Mix Color Essentials Gems

SPELLBINDERS CLUB KITS

Spellbinders Club Kits are wonderful monthly subscription where you receive a kit each month. Designers like myself share inspiration using the kits at the beginning of the month to show you lots of different ways that you can use it. 

I am using the Large Die of the Month Club Kits but there are also lots of other club kits too, like the Small Die of the Month, Clear Stamp & Die of the Month, Embossing Folder of the Month (plus lots more!), so there is something for everyone! If you do subscribe, you will get other benefits from Spellbinders too. Please see here for more information. You can also buy older kits here too. 

To buy the kit - if you are a current subscriber to the Large Die of the Month Club Kit (or any kit), you do not need to do anything. You will be charged as normal on the 5th of the month and your kit will be shipped to you. If you are a new subscriber, you can purchase the kit from the 6th - 27th July 2024. Members can cancel their membership at any time.


SUPPLIES:


Here are the links to what I have used on the project. Affiliate links are used on some products. This means that if you make a purchase after clicking on my link, I receive a small commission with no extra cost to you. I truly appreciate your support when using these links. Please click on the logo below the product to shop at your favourite store. All products were personally purchased except those from Clearly Besotted, Hero Arts or those marked with an asterisk (*) which were kindly sent to me to use. You can read my full disclosure here.


Thank you so much for stopping by today. Whilst this isn't actually the first Christmas/holiday card I have made of the year, it is the first I have shared (I have more to share later in the month!). I always find it odd making Christmas cards during the summer but I am hoping that it will mean I will have lots to send out when the time comes! Thank you so much for stopping by today, I really do appreciate it. I hope you have a wonderful day! 

10 July 2024

Altenew | July 2024 Release Blog Hop + Giveaway

Hello there, I am delighted to be joining Altenew today for a fun blog hop to celebrate the July 2024 release. There are lots of new stamps, dies, stencils, press plates, inks and embellishments in this release and I am using a few on my card today. 

PLEASE NOTE: This post contains affiliate links. Please see below for my full disclosure.

BUILD-A-GARDEN: SULFUR COSMOS

For my first card, I am using the Altenew Build-A-Garden: Sulfur Cosmos + Add-on Die Bundle. You can purchase the kit without the die as a bundle with the stamp set, coordinating stencils and blending brush, with the coordinating die as a whole bundle, or you can purchase the die just on it's own (if you are a subscriber and want the die as an extra). 

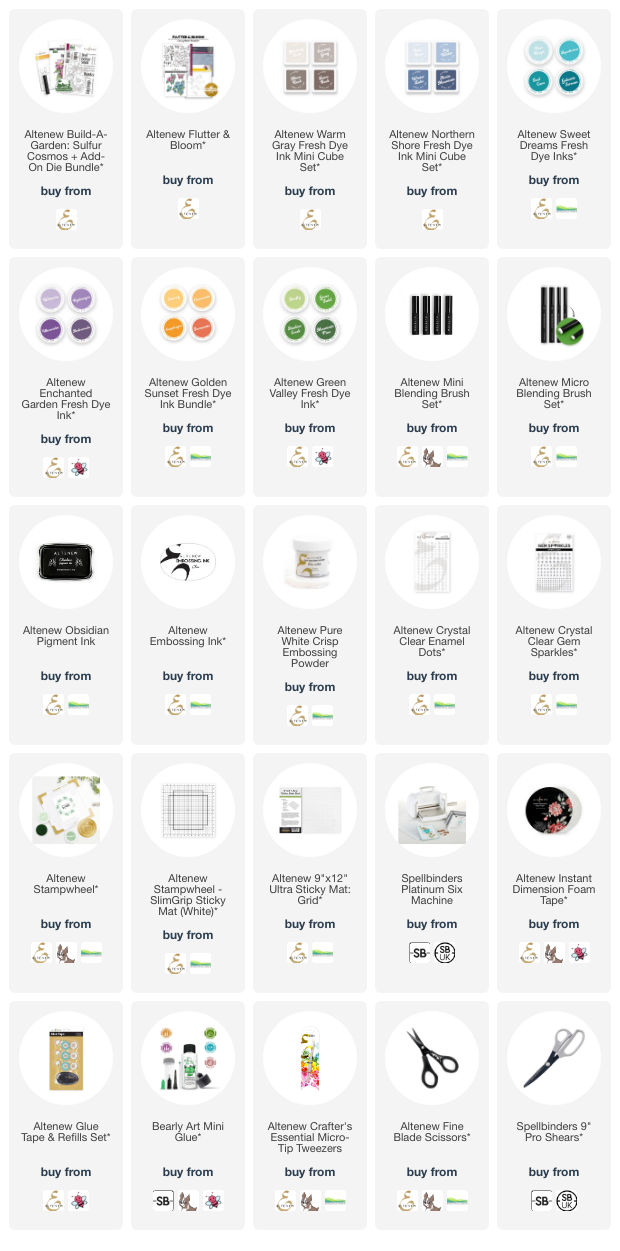
I started off by stamping the floral image from the set onto white cardstock using Altenew Obsidian Pigment Ink. Once the ink was dry, I placed the Simple Colouring Stencils on top, one by one, to colour the image using ink blending. I used Altenew Enchanted Garden Fresh Dye Inks for the flower petals, Altenew Golden Sunset Fresh Dye Inks for the flower centres and Altenew Green Valley Fresh Dye Inks for the stems and leaves. 

The image was die cut out using the coordinating stencil and then adhered to a US A2 sized white card base with Altenew Instant Dimension Foam Tape. The excess was cut off the bottom using scissors. I stamped the large 'thanks' sentiment from the set onto white cardstock with more Altenew Obsidian Pigment Ink. It was cut out using the coordinating die. I also cut the die another two times from white cardstock and adhered them one on top of another (for added dimension) before adhering to the card.

The accompanying sentiment was stamped onto black cardstock using Altenew Embossing Ink. I applied Altenew Pure White Crisp Embossing Powder and heat set. It was adhered to the card using more foam tape. To finish off, I embellished with Altenew Crystal Clear Gem Sparkles

FLUTTER & BLOOM

My next card uses the beautiful Altenew Flutter & Bloom set. There is a large 8" x 11" stamp set, coordinating dies, stencils and an embossing folder in this collection. My first card uses the embossing folder and stencils.

I started off by placing a 4.25" x 5.5" panel of white cardstock inside the Altenew Flutter & Bloom 3D Embossing Folder and ran it through my die cutting machine. I placed it on an Altenew Sticky Mat and then placed the stencils on top, one by one, to colour the image using ink blending. 

I used the new Altenew Northern Shore Fresh Dye Inks for the flowers, Altenew Warm Gray Fresh Dye Inks for the leaves and then Altenew Sweet Dreams Fresh Dye Inks for the butterfly (with a little Warm Gray for the body). The panel was adhered to a US A2 sized white card base with Altenew Glue Tape

The sentiment, from Altenew Build-A-Garden: Sulfur Cosmos, was stamped onto black cardstock using Altenew Embossing Ink. I applied Altenew Pure White Crisp Embossing Powder and heat set. It was cut into a strip and adhered to the card with Altenew Instant Dimension Foam Tape. To finish, I embellished with Altenew Crystal Clear Enamel Dots.

For my last card today, I used Altenew Flutter & Bloom again but this time, I used the stamp, dies and stencils. I stamped the floral image from the set onto white cardstock using Altenew Obsidian Pigment Ink. I then placed the stencils on top and one by one, added ink blending to colour the image. 

I used Altenew Enchanted Garden Fresh Dye Inks for the flower petals, Altenew Golden Sunset Fresh Dye Inks for the flower centres and Altenew Green Valley Fresh Dye Inks for the stems and leaves. The image was then die cut out using the coordinating die and adhered to a US A2 sized white card base with Altenew Instant Dimension Foam Tape

I cut off the excess with scissors and then stamped and heat embossed the sentiments from the set onto black cardstock. I cut them into strips and adhered them to the card with more foam tape. To finish, I embellished with Altenew Crystal Clear Enamel Dots

BLOG HOP:

This blog post is part of a fun, inspirational blog hop with prizes. Please click on the pictures below to visit the other participants in the hop. 

You are invited to the Inlinkz link party!

Click here to enter

GIVEAWAY:

$300 in total prizes! To celebrate this release, Altenew is giving away a $100 gift certificate to 1 lucky winner and a $50 gift certificate to 4 winners! Please leave a comment on the Altenew Card Blog and/or each designer’s blog post on the blog hop list below by July 16, 2024 for a chance to win. Altenew will draw 5 random winners from the comments left on each stop of this blog hop and announce the winners on the Altenew Winners Page on July 18, 2024*The winner of the $100 gift certificate will be chosen from comments left on the Altenew blog. 

SUPPLIES:


Here are the links to what I have used on the projects. Affiliate links are used on some products. This means that if you make a purchase after clicking on my link, I receive a small commission with no extra cost to you. I truly appreciate your support when using these links. Please click on the logo below the product to shop at your favourite store. All products were personally purchased except those from Clearly Besotted, Hero Arts or those marked with an asterisk (*) which were kindly sent to me to use. You can read my full disclosure here.


Thank you so much for stopping by today, I hope you have a wonderful time on the rest of the hop and a great rest of the day too! Take care! 

3 July 2024

Spellbinders | Peach Blush Floral Spray

Hello there, I hope you are well. Have you ever picked a colour combination for a card based on the embellishments you want to use? It is not something I usually do but I really wanted to use the new Spellbinders Peach Blush Color Essentials Gems. Although peach isn't a colour that I use that much, I thought they were so pretty that I couldn't resist giving it a go! 

PLEASE NOTE: This post contains affiliate links. Please see below for my full disclosure.


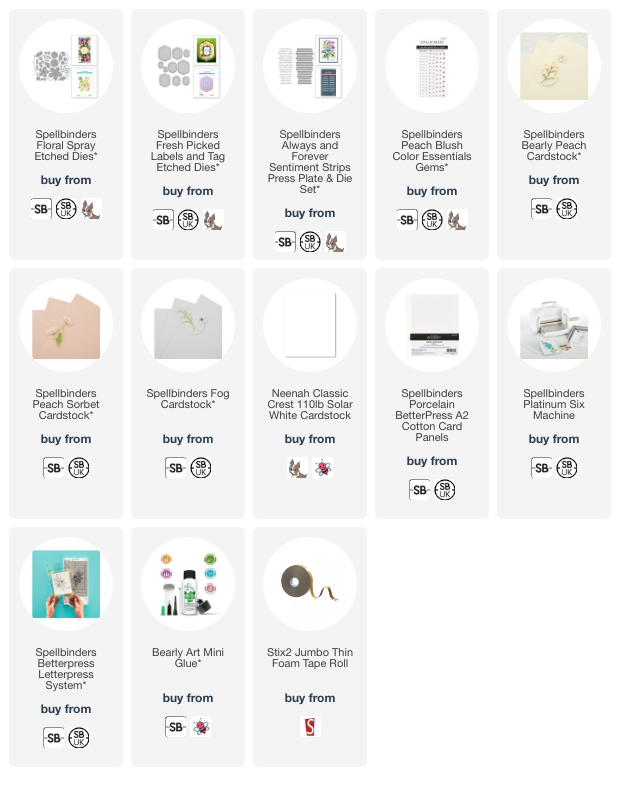
I started off my card by die cutting the flowers from the Spellbinders Floral Spray Etched Dies set from Spellbinders Bearly Peach and Peach Sorbet Cardstock. I cut the leaves and stems from Spellbinders Fog Cardstock. I adhered the layers together using Bearly Art Glue


I cut one of the Spellbinders Fresh Picked Labels & Tag Etched Dies from white cardstock and then placed the flowers and leaves on top, creating an arrangement. I adhered the leaves and stems with Bearly Art Glue and the flowers using thin foam tape. I cut another of the label shape from white cardstock and adhered it behind the floral one (for added dimension) before adhering to a US A2 sized white card base with Bearly Art Glue. 


I took the Spellbinders Always & Forever Sentiment Strips and pressed it onto Spellbinders Porcelain Cotton Cardstock using BetterPress Black Ink and the Spellbinders BetterPress Letterpress System. I die cut it using the coordinating die before adhering the sentiment strip to the card with thin foam tape. To finish, I embellished with Spellbinders Peach Blush Color Essentials Gems

SUPPLIES:


Here are the links to what I have used on the project. Affiliate links are used on some products. This means that if you make a purchase after clicking on my link, I receive a small commission with no extra cost to you. I truly appreciate your support when using these links. Please click on the logo below the product to shop at your favourite store. All products were personally purchased except those from Clearly Besotted, Hero Arts or those marked with an asterisk (*) which were kindly sent to me to use. You can read my full disclosure here.


There are lots of new colours of gems that were released last month - pinks, purples, blues etc. but I am really glad I picked the peach. I really love how the card turned out and I doubt I would have used the colour combination otherwise! 

Thank you so much for stopping by today, I really do appreciate it. I hope you have a wonderful day! 

1 July 2024

Hero Arts | Hero Studio July 2024 Release Blog Hop + Giveaway

Hello there and welcome as we celebrate the Hero Studio July 2024 release! I will share more about the individual kits and products below but first, let's see what I have made. The release this month is mainly beach and ocean themed, so great for summer! 

PLEASE NOTE: This post contains affiliate links. Please see below for my full disclosure.


For my first card, I am using the Hero Arts July 2024 Hero Studio Card Kit of the Month. I took inspiration for my card from these cards that I made last year. I started off by die cutting a Hero Arts Hexagon Infinity Die from Hero Arts Deluxe Smooth White Cardstock. I then took the sea image from the Victorian Seaside Clear Stamp Set and stamped it at the bottom of the hexagon using Hero Arts Paradise Core Ink


Using Blending Brushes, I blended Hero Arts Core Inks in Lemon Yellow, Papaya and Pale Tomato at the top of the hexagon for the sky. I then stamped the cloud image from the set on top with Papaya Ink. I blended a little Hero Arts Bermuda Core Ink to the bottom of the hexagon to darken the sea a bit. I stamped the boat, seagull and sentiment on top using Hero Arts Intens-ified Black Ink. The panel was then adhered to a hexagon shaped card base with thin foam tape. 


In case you missed it, here is the card I made for the countdown using the Hero Studio July 2024 Clear Set + Dies of the Month. You can see more details about the card HERE


My last card uses the Hero Studio July 2024 Fancy Dies of the Month. I started off by creating the background - I took a panel of white cardstock and using Blending Brushes, blended Hero Arts Core Inks in (bottom to top) Lemon Yellow, Soft Blossom, Ultra Pink, Orchid and Amethyst on top. The panel was adhered to an US A2 sized white card base with tape runner adhesive. 


I then die cut the cloud background die three times from white cardstock and adhered them one on top of another before adhering onto the card. I die cut the hot air balloon from Hero Arts Pitch Black Cardstock three times and again adhered them one on top of another for added dimension. I added Hero Arts Classic Vellum Layering Paper to the back before adhering onto the card with thin foam tape. 


I stamped the sentiment from the Hero Arts Art Journal Messages Stamp Set onto Hero Arts Pitch Black Cardstock using Hero Arts Clear Embossing & Watermark Ink. I applied Hero Arts White Detail Embossing Powder and heat set. It was cut into strips and adhered to the card with more thin foam tape. To finish, I embellished with Hero Arts Clear Enamel Dots


Introducing the reimagined Hero Arts monthly subscription program, now with six original options each month. Subscribe by the 1st of the month to guarantee you get the product. Free (US) shipping on all Hero Studio subscriptions. You can add extra product to your order by Thursday of launch week and they will ship with no extra shipping charges.

Hero Studio products are also available for purchase without a subscription at full price, while supplies last. Once they sell out, they are gone for good!

CARD KIT OF THE MONTH

KIT INCLUDES:

Victorian Seaside Clear Stamp Set, 6" x 8"
22 Coordinating Dies
Sand Castle Fancy Dies
Rock Cling Stamp, 6" x 6"
Victorian Seaside Reactive Palette Ink Pad
2 Sheets Map Hero Transfers (Rub-ons), 6" x 8"
2 Sheets Each of Blue, Purple, Green Vellum, 5.5" x 8.5"
2 Sheets Each of White Lava Holographic, White Rainbow Holographic Cardstock, 5.5" x 8.5"

The Card Kit of the Month costs $46.00 with the subscription program or $49.99 without a subscription. 

Next up are the Monthly Minis: 

CLEAR SET + DIES OF THE MONTH

This month's Clear Set & Dies of the Month is called Mermaids & Seahorses and costs $27.50 with subscription or $29.99 without a subscription.

CLING OF THE MONTH

This month's Cling Stamp of the Month is called Tentacles and costs $15.00 with subscription or $15.99 without a subscription. 

FANCY DIES OF THE MONTH


This month's Fancy Dies of the Month is called Clouds & Balloons and costs $25.00 with subscription or $26.99 without a subscription. 

LAYERING STENCIL OF THE MONTH


This month's Layering Stencil of the Month is called Color Layering Fish and costs $15.00 with a subscription or $15.99 without a subscription. 

THE WHOLE STUDIO

Want it all? The Whole Studio includes ALL 5 of the monthly subscriptions in one glorious and discounted buy. Includes: Cling of the Month, Clear + Dies of the Month, Layering Stencil of the Month, Fancy Dies of the Month, and the Card Kit of the Month. Its costs $120.00 with a subscription or $138.95 without a subscription.

For more information on subscribing to the kits, please see here.

EXTRAS

There are also extra products releasing this month that coordinate with the kits. These are not limited edition and can be purchased from Hero Arts or your favourite Hero Arts stockist.

BLOG HOP:

This post is part of a fun, inspirational blog hop with prizes. For the hop, you should have arrived here from the fabulous Lydia. Next on the hop is the wonderful Natasha. If you get lost along the way or want to start the hop from the beginning, please head over to the Hero Arts Blog

GIVEAWAY:

Hero Arts are giving away a $50 gift card, drawn from the comments left across all the stops in the hop. Enter by Sunday 7th July 2024 at 11.59pm PT. The winner will be announced on the Hero Arts Blog the following week.

SUPPLIES:


Here are the links to what I have used on the projects. Affiliate links are used on some products. This means that if you make a purchase after clicking on my link, I receive a small commission with no extra cost to you. I truly appreciate your support when using these links. Please click on the logo below the product to shop at your favourite store. All products were personally purchased except those from Clearly Besotted, Hero Arts or those marked with an asterisk (*) which were kindly sent to me to use. You can read my full disclosure here.


Thank you so much for stopping by today, I really do appreciate it. I hope you have a wonderful time of the rest of the hop and a great rest of the day too! Take care!