
Hello there, today I have something a little different to share with you - my filming set up. I have shown bits of this in my craft room tours, but I have never shown my set up with my lights out so I thought I would do that today.

My set up is not fancy, I am in no way saying that this is the professional way to do it or this is what you should do (if you make videos/want to get into making videos) but just a behind the scenes look at how I do it. I have to use artificial lighting when making videos. In an ideal world, I wouldn't but even on really sunny days, I just do not get good enough lighting without having artificial lights.

The only problem with this, is that I have to get them in and out each time I want to make a video. This is not a huge problem but I am not going to lie, it would be easier if I didn't have to and I would likely make more videos if I didn't have to set up my room each time, but that is ok!

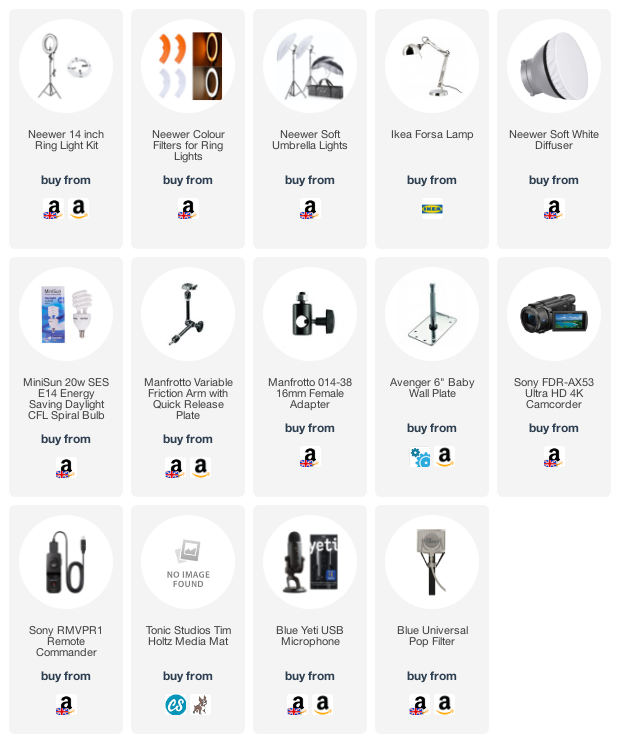
I have two Neewer 14" Ring Lights that are usually behind me while I am sitting at my desk. This helps to prevent glare on my media mat. I have two sets of lights - Soft Umbrella Lights and ring lights (which are shown here). I use both sets at different times. The ring lights are great as they do not take up a lot of space but obviously you have to have the space to have them out on the stands. Although, I am sure they could be attached to the ceiling if you wanted.
I also have an Ikea Forsa Lamp that sits on my desk and I use that along with my lights too. I have a piece of tracing paper over the light bulb to help reduce the glare. It is not pretty but it works!

My camera attaches to a Manfrotto Variable Friction Arm that attaches to the wall with a Baby Wall Plate. You can now get the system as a whole, with the wall plate attached but at the time of me using this set up, it did not exist. There is a quick release plate at the end so that I can add and remove my camcorder easily. I use a Sony Camcorder to film, along with a Sony Remote Commander. I film from above on to the Tim Holtz Media Mat.

While I am filming, I like to try and keep my desk clear so that I have as much space as possible. I do keep a small tray on my desk that I keep the supplies on that I will be using in the video. For the most part, my room is set up so that most things are easy to grab whilst I am sitting at my desk.
VIDEO:
Here is the video showing my set up:
If you are viewing this blog post via email subscription, you can watch the video HERE on YouTube.
SUPPLIES:
Here are the links to what I shared in the video. Affiliate links are used on some products. This means that if you make a purchase after clicking on my link, I receive a small commission with no extra cost to you. I truly appreciate your support when using these links. Please click on the logo below the product to shop at your favourite store. All products were personally purchased except those from Clearly Besotted, Hero Arts or those marked with an asterisk (*) which were kindly sent to me to use. You can read my full disclosure here.
I hope you have enjoyed taking a little peek behind the scenes with me on how I film my videos. I hope you have a great day and a wonderful weekend!
Fun to be nosey, you would die laughing if you saw my " craft" area !
ReplyDelete