Pages

30 September 2017

Greetings from the North Pole

Hello there, I am over on the Hero Arts Blog today sharing a look at the new My Monthly Hero Kit which is out on Monday (2nd October 2017). What a fabulous kit and I especially love the stamp set which has lots of little images that you can use to build scenes.
 
 
I decided to create a little North pole scene for my card today. Please head over to the Blog Post for more details on how I made it. Thanks so much for visiting me today. I hope you have a great weekend!

29 September 2017

Meowy Halloween + Let It Snow

** This is my second post for the day, please see below for my Neat & Tangled Guest Design post **

Hello there, today I have the great pleasure of guest designing with Studio Katia. I was sent some of the new release to play with and I had so much fun creating both of these cards, as well as the cards I made for the release blog hop. My first card uses the super cute Meowy Halloween stamp set and coordinating dies.
 

I started off by stamping the cat and pumpkin bucket/bag on to white cardstock using Memento Tuxedo Black ink. I coloured the images using Copic Markers (the colours I used are listed below the supplies section). The hat and bucket were then cut out using the coordinating dies. I love that the die cuts the hands of the cat so that she can hold the bucket/bag (or other accessories). I then took a piece of white cardstock and cut out an aperture from it using one of the dies from the new Dotted Patterns: Scallop Frames die set. I then stamped the sentiment below this using black ink.
 
 
I took a piece of watercolour paper and blended over Distress Inks in Wilted Violet, Dusty Concord and Black Soot. I then made a mixture of Perfect Pearls and water in a Mini Mister and sprayed this on to the piece. Once dry, I adhered this piece on to a black A2 card base with ATG. I then added the white panel on top with foam tape. The kitty was added to the inside of the window using foam tape also. To finish off, I added a few Clear Drops inside the window.
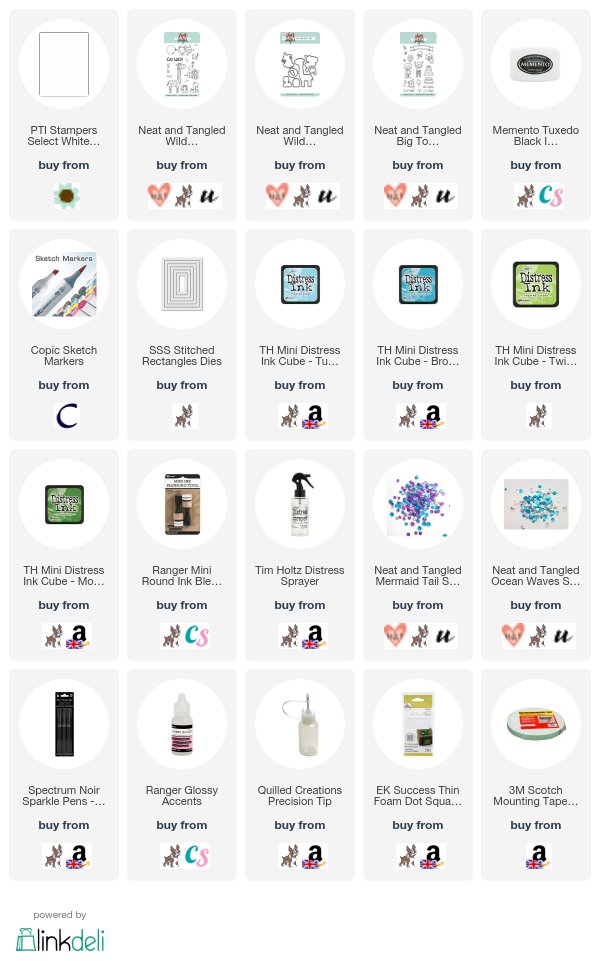

SUPPLIES:

Here are the links to what I have used on the card. Affiliate links are used on some products. This means that if you make a purchase after clicking on my link, I receive a small commission with no extra cost to you. I truly appreciate your support when using these links. Please click on the logo below the product to shop at your favourite store. Products marked with an asterisk (*) were kindly sent to me to use.
 

COPIC MARKERS: Cat - W6, W4, W2, W1, R00. Hat - 110, C10, C8, C5, YG99, YG67, YG03. Collar - YG99, YG67, YG03. Pumpkin bucket/bag - YR24, YR35, Y38, YR23.

My next card uses the super cute Winter Kobi set, along with the coordinating dies. I love that you can create some fun scenes with this set. I went for a simple winter scene.
 

I started off by stamping Kobi, the sledge and presents on to white cardstock. The images were then coloured using Copic Markers (colours used listed below the supplies section) and then die cut out with the coordinating dies. I then took another piece of white cardstock and cut this using the largest die from the Dotted Patterns: Scallop Frames die set. I made a snow bank from mask paper and added this on top. I then blended Broken China Distress Ink on to it and removed the mask.
 
 
I took the sentiment from the Friends of Winter set and stamped this on to the panel using black ink. The panel was then adhered to a white A2 card base with foam tape. I added Kobi, the sledge and presents on top with more foam tape. To finish off, I added a few Crystal Rainbow Confetti.


SUPPLIES:

Here are the links to what I have used on the card. Affiliate links are used on some products. This means that if you make a purchase after clicking on my link, I receive a small commission with no extra cost to you. I truly appreciate your support when using these links. Please click on the logo below the product to shop at your favourite store. Products marked with an asterisk (*) were kindly sent to me to use.
 

COPIC MARKERS: Kobi - W6, W4, W2, W1, W00, R000. Scarf - V17, V15, V12, V01. Presents - R85, R83, R81, RV000, BG11, BG10. Sledge - C5, C1, V17, V15, V12.

A big thank you goes to Katia and her team for having me guest design today. Thanks so much for visiting me today. I hope you have a great rest of the day and a fabulous weekend!

Hugs

Hello there, today is my final post for Neat and Tangled. I have loved Guest Designing with them and for today's card, I thought I would share some hugs with you all! I am using the super cute Better Together set, along with the coordinating dies.


I started off by stamping the girl with her owl and the bear on to some white cardstock using Memento Tuxedo Black Ink. I then coloured the images using Copic Markers (the colours I used are listed below the supplies section). The images were then cut out using the coordinating Nice & Neat Dies.
 
 
I die cut a square using a SSS Stitched Square Die and then cut a stitched circle from the middle of this to create a frame. I took a piece of paper from the MFT Homespun Gingham Paper Pad and added this to a white 4.75" x 4.75" square card base. I then stamped the hugs sentiment on top. The frame was added on top with foam tape and then the images were added with a combination of foam tape and tape runner. To finish off, I added a little jewel to the centre of the girl's bow.
 
SUPPLIES:
Here are the links to what I have used on the card. Affiliate links are used on some products. This means that if you make a purchase after clicking on my link, I receive a small commission with no extra cost to you. I truly appreciate your support when using these links. Please click on the logo below the product to shop at your favourite store. Products marked with an asterisk (*) were kindly sent to me to use.
 
 
COPIC MARKERS: Girl skin - E13, E11, E51, E50, R20. Hair - E59, E27, E25, E23. Clothes - R12, R00, R000. Owl - W6, W4, W2, W1, W0, W00, Y11. Bear - E59, E27, E25, E23, E21, E51, E50.
 
It has been a pleasure Guest Designing with Neat and Tangled this month. A big thank you goes to Miriam and Danielle for having me. For more inspiration using Neat and Tangled products, please head over to their blog. Thanks so much for visiting me today. I hope you have a great day!

27 September 2017

Under The Sea

Hello there, today I am back with my final card for Stamping Bella this month. Today I am using the Under The Sea Backdrop, along with the creatures and the sentiment set. Aren't these sea creatures just adorable?!
 

I started off by taking a piece of cardstock that was cut using the Femme Frames die. I then stamped the Under The Sea Backdrop on to it and coloured it with Copic Markers (the colours I used are listed below the supplies section). I then stamped the sentiment on to this using Black Ink.
 
 
I took the Under The Sea Creatures and stamped these on to more white cardstock with black ink. I coloured them with Copic Markers and then cut them out with the coordinating dies. I added the background piece flat on to a white card base (with ATG) and then added the creatures on top with foam tape. To finish off, I added a little Crystal Glaze to the bubbles.
 
SUPPLIES:
Here are the links to what I have used on the card. Affiliate links are used on some products. This means that if you make a purchase after clicking on my link, I receive a small commission with no extra cost to you. I truly appreciate your support when using these links. Please click on the logo below the product to shop at your favourite store. Products marked with an asterisk (*) were kindly sent to me to use.
 
 
COPIC MARKERS: Sea - B05, B04, B02, B00. Sand - E44, E43, E42, E41. Seaweed/plants - YG17, YG23, YG03, YG01. Turtle - YG17, YG23, YG01, YG63, YG67, YG99. Octopus - V06, V05, V04, V01. Fish - YR16, YR15, YR12, C1, C0. Starfish - Y21, Y32, Y12, YR12.
 
I am so sad that my month with Stamping Bella is up but I have had a great time! A big thank you goes to Em for having me back! For more inspiration using Stamping Bella stamps and dies, please head over to the blog. Thanks so much for visiting me today. I hope you have a great day!

25 September 2017

Swimming By ...

Hello there, today I have a card to share that I made for my niece for her birthday. I was eager to ink up the MFT Mermazing Set and I thought the mermaid and turtle would be really cute on a card for her.
 

I started off by stamping the mermaid and turtle from the set using Memento Tuxedo Black. I coloured the images using Copic Markers & Spica Glitter Pens (the colours I used are listed below the supplies section) and then die cut them out using the coordinating dies. I then die cut a piece of Bristol cardstock using one of the MFT Stitched Dome Dies. I took the MFT Cloud Stencil and used this to create waves on to the panel using Distress Inks. I then stamped the plants at the bottom with MFT Sour Apple Ink.
 
 
To add some fun to the card, I decided to use an acetate card base. I added the background piece first using tape runner and then adhered the mermaid and turtle on top with foam tape. I then took a piece of black cardstock and stamped the 'swimming by to say' sentiment from the Sunny Studio Magical Mermaids set on to this using Versamark ink. I then took the 'happy birthday' sentiment from the MFT Adorable Elephants set and stamped this below. I applied white embossing powder and heat set. The piece was cut down and then added to the card with foam tape. To finish off, I added Morning Dew (clear) Nuvo Drops to look like water bubbles.
 
SUPPLIES:
Here are the links to what I have used on the card. Affiliate links are used on some products. This means that if you make a purchase after clicking on my link, I receive a small commission with no extra cost to you. I truly appreciate your support when using these links. Please click on the logo below the product to shop at your favourite store. Products marked with an asterisk (*) were kindly sent to me to use.
 
 
COPIC MARKERS - Mermaid skin: E13, E11, E51, E50, R20. Hair: E55, E53, E51, E50. Top & hair clip: R85, R83, R81. Tail: R85, R83, R81, RV00, RV000, BG13, BG11, BG10, BG00, Spica Pink 02, Turquoise 08. Turtle: YG17, YG23, YG01, YG99, YG67, YG63, Spica Mint 17.
 
Since the acetate card is clear, I did cut three more of the domes to add to the inside of the card and also the back. This hid the adhesive and gave me somewhere to write. I had been hording the acetate card bases, so it was fun to finally use one! Thank you so much for visiting me today. I really do appreciate it. I hope you have a great day!

24 September 2017

Studio Katia Winner

Hello there, thank you so much to everyone who entered the giveaway on my Studio Katia Fall & Winter Blog Hop post. I really hope you enjoyed the blog hop and got some inspiration on using the fabulous new products from Studio Katia.

Random.org has kindly picked a winner. The winner is ...

CM/CAROL


Carol, please could you email me using the link on my sidebar ---> and I will give you the instructions on how to claim your prize!
 
Thanks again to everyone who entered. Be sure to check out the Studio Katia Blog to see if you are one of the other winners. Have a great rest of the weekend!

22 September 2017

Sunny Studio Birthday Blog Hop

** This is my second post of the day, please see below for my Neat & Tangled Guest Design post **

Hello there, I am delighted to be taking part in Sunny Studio's 2nd Birthday celebrations today. They are one of my favourite companies and I just adore their stamps. Today we are using the new holiday release which is out on the 29th September. In honour of the birthday celebrations, you can pre-order the new products now! Yay!


If you are following along in the hop, you should have arrived here from the fabulous Vanessa but if you get lost along the way, I have the full list of participants below.
 
My first card uses the fabulous new Playful Polar Bears stamp set. The polar bears are just so cute! I started by stamping the bear of on to white cardstock. I then masked him and stamped the sleigh below so that it looks like he is sitting on it. 


The mask was removed and I coloured the image with Copic Markers. I stamped and coloured the present too. These were both then fussy cut out using scissors. I took a piece of white cardstock and cut an MFT Dome Stax die on to the bottom left hand side. Using the positive piece, I blended over Shaded Lilac and Wilted Violet Distress Inks on to it using a blending tool. I adhered this down to a purple A2 card base.

 
I then took the negative panel piece and added acetate to the back. I applied foam tape around the opening to create a shaker card. I didn't want the sequins to move that much so I only added one layer of foam tape. I added the Lucy's Magical Shaker bits on to the card base and then added the panel on top. I added the polar bear and present on top with more foam tape. I then white embossed the sentiment on to black and added this to the card with foam tape also.

SUPPLIES:
Here are the links to what I have used on the card. Affiliate links are used on some products. This means that if you make a purchase after clicking on my link, I receive a small commission with no extra cost to you. I truly appreciate your support when using these links. Please click on the logo below the product to shop at your favourite store. Products marked with an asterisk (*) were kindly sent to me to use.
 

COPIC MARKERS: Bear - E51, E50, C8, C5. Scarf - V17, V15, V12, BV11. Sleigh - E57, E55, C5, C3, C1. Present - V12, V01, V000, B93, B63.
 
My second card uses the Playful Polar Bear stamp set as well as the Frosty Flurries set. I started off by creating the background. I die cut a piece of Bristol cardstock using a stitched square die. I then created a snow bank from mask paper and added this to the panel. I repeatedly stamped the Frosty Flurries stamp across the panel. I then applied white embossing powder and heat set.
 

With the mask still in place, I blended over Shaded Lilac and Wilted Violet Distress Inks. The mask was then removed. I took the skating bear from the set and stamped this on to white cardstock with black ink. I coloured him using Copic Markers. He was then fussy cut out with scissors (there are dies available, I just do not have them yet).
 
 
The panel was adhered to a black 4.75"x4.75" card base with foam tape. The bear was then added with foam tape on top. I stamped the sentiment on to a piece of black cardstock using Versamark Ink. I applied white embossing powder and heat set. This was cut in to a strip and then added to the card with foam tape. To finish off, I added Sparkle Pen to the scarf and added a few Lucy's Magical sequins around the sentiment piece.
 
SUPPLIES:
Here are the links to what I have used on the card. Affiliate links are used on some products. This means that if you make a purchase after clicking on my link, I receive a small commission with no extra cost to you. I truly appreciate your support when using these links. Please click on the logo below the product to shop at your favourite store. Products marked with an asterisk (*) were kindly sent to me to use.
 
 
COPIC MARKERS: Bear - W3, W1, W0, R02, R00, C8, C5. Scarf - V17, V15, V12. Skates - V17, V15, V12, C5, C3, C1.
 
BLOG HOP:

The full list of participants in the hop are as follows:
 
Michelle Short - you are here
 
GIVEAWAY:

I have a $25 gift voucher to the Sunny Studio store to give away. All you have to do is comment on this post and I will randomly pick a winner. The giveaway closes on Monday 25th September at 23.59 PDT. The winners will be announced on the Sunny Studio Blog on Friday 29th September. The giveaway is open worldwide. Good luck!
 
On top of that, Sunny Studio are offering 15% off all retail orders using the code CELEBRATE through to till October 1st.
 
The next person in the hop is the amazing Anni. Thank you so much for visiting me today. I hope you have a great time on the rest of the hop and a fabulous day!

Big Hugs

Hello there, today I have a card to share for my Guest Design post for Neat and Tangled. Today I am using the Big Hugs Die along with the Star Stencil. I wanted to keep the card simple to focus on the die so I made a simple background to go with it.
 

I started off by embossing the Star Stencil on to some TH watercolor paper. I then sprayed the piece using Heidi Swapp Color Shine in Teal and Ocean. It is difficult to see in the photos but the background has a beautiful shimmer to it from the sprays.


I wasn't sure whether to emboss the stencil first or after adding the colour but I am glad that I did it before, as the colour ran into the embossed edges and I think it made the background more interesting.
 
 
I die cut the Big Thanks Die three times from white cardstock and stacked these up using liquid glue. I added the background piece to a white A2 card base with foam tape and then added the hugs die on top with more liquid glue.
 
SUPPLIES:
Here are the links to what I have used on the card. Affiliate links are used on some products. This means that if you make a purchase after clicking on my link, I receive a small commission with no extra cost to you. I truly appreciate your support when using these links. Please click on the logo below the product to shop at your favourite store. Products marked with an asterisk (*) were kindly sent to me to use.
 
 
Like I said, very simple but I have to say, I really like how this card came out. I think I might make some more with different colours for the backgrounds. For more inspiration using Neat and Tangled products, please head over to their blog. Thanks so much for visiting me today. I hope you have  a great day!

21 September 2017

Wonderful Christmas

Hello there, did you see that I posted over on the Hero Arts Blog yesterday? I shared this card using the Wonderful Stamp & Cut. I love that you can use the Wonderful Stamp & Cut all year round for lots of different occasions but I decided to combine it with the holly from the Bird Words stamp set for a quick and simple Christmas card today.
 
 
SUPPLIES:

Here are the links to what I have used on the card. Affiliate links are used on some products. This means that if you make a purchase after clicking on my link, I receive a small commission with no extra cost to you. I truly appreciate your support when using these links. Please click on the logo below the product to shop at your favourite store. Products marked with an asterisk (*) were kindly sent to me to use.
 
 
For more information on how I made the card, please head over to the Hero Arts Blog. Have you seen? to celebrate STAMPtember, Simon Says Stamp are offering 20% off all purchases on Hero Arts products in their store until 23.59 hrs EDT on the 22nd September (that is 04.59 hrs on 23rd September for us in the UK). Go grab some goodies! Thanks so much for popping by today, I hope you have a great day!

20 September 2017

Especially For You

Hello there, today I have another card to share with you as part of me guest designing with Stamping Bella. One of my favourite lines of theirs is Petunia (the pig). Isn't she just adorable? I love her! My card today uses the super cute Especially For you Petunia.
 

I started off by cutting a circle using the SSS Stitched Circles Dies. I then stamped Petunia inside the circle. The image was then coloured using Copic Markers (the colours I used are listed below the supplies section). I took the sentiment from the Kitty & Mousie set and stamped this on to black cardstock with Versamark ink. I applied white embossing powder and heat set. This was then cut in to two strips.
 
 
I die cut a square from MFT Itsy Bitsy Polka Dots Pastel Paper using the Stitched and Pierced Squares dies set from CraftStash. This was added on to a white 5.25 x 5.25 card base with ATG. I then added the image circle on top with foam tape. The sentiment pieces were then added with more foam tape to finish.
 
SUPPLIES:
Here are the links to what I have used on the card. Affiliate links are used on some products. This means that if you make a purchase after clicking on my link, I receive a small commission with no extra cost to you. I truly appreciate your support when using these links. Please click on the logo below the product to shop at your favourite store. Products marked with an asterisk (*) were kindly sent to me to use.
 
 
COPIC MARKERS: Pig - R32, R21, R20, R12, R11, R00, R000. Grass & leaves - YG17, YG23, YG03, YG01. Chick - Y38, Y19, Y15, Y13, Y00. Sky - B000, B0000, 0.
 
I do hope Stamping Bella continue to make more stamps with Petunia! For more inspiration, please head over to the Stamping Bella Blog. Thanks so much for visiting me today. I hope you have a great day!

18 September 2017

Bold Blooms

Hello there, today I have a card to share with you using the beautiful Happily Ever After stamp set from Clearly Besotted. The set is geared towards weddings but as you can see, you can use the flowers for any occasions. I went with a birthday card as I seem to lack some of these in my stash.
 

I started off by stamping the flowers on to a piece of cardstock cut using the rectangle ME Femme Frames die. I stamped the image with Memento Tuxedo Black Ink and then coloured it with Copic Markers. As you may notice, I went with bolder colours than I usually do with my colouring. I am loving using black card bases at the moment and I thought the bold colours would make a nice contrast to the black.
 
 
The panel was adhered flat to an A2 black card base with ATG. I then stamped the sentiment, from the Tiny Type stamp set, on to a piece of black cardstock with Versamark Ink. I applied white embossing powder and then heat set. The piece was cut in to strip and added to the card with foam tape. To finish, I added a few Lucy's Clear Iridescent Jewels.
 
SUPPLIES:
Here are the links to what I have used on the card. Affiliate links are used on some products. This means that if you make a purchase after clicking on my link, I receive a small commission with no extra cost to you. I truly appreciate your support when using these links. Please click on the logo below the product to shop at your favourite store. Products marked with an asterisk (*) were kindly sent to me to use.
 
 
COPIC MARKERS: Flowers - V17, V15, V12, V01. Leaves - YG67, YG17, YG23, YG01. Background/halo - B01, B00, B000, B0000, 0.
 
I seem to have an obsession with white embossing my sentiments on black cardstock at the moment. Sorry about that! :) Thank you so much for visiting me today, I really do appreciate it. I hope you have a great week!

16 September 2017

STAMPtember | Purple Pansies

Hello there, have you been enjoying seeing all of the Simon Says Stamp STAMPtember collaboration sets? Yesterday was Clearly Besotted's turn. How gorgeous are these stamp/colour layering pansies?
 

I started off by cutting a panel of white cardstock using one of the SSS Stitched Rectangle dies. I then took the bottom layer of the pansies and stamped these on to the panel using MFT Grapesicle ink. I then stamped the middle layer with SSS Lavender ink and then the top layer using MFT Grape Jelly Ink. I made a mask for them and then stamped the leaves around. I used MFT Sour Apple, SSS Green Apple and MFT Gumdrop Green inks.
 
 
I then stamped the sentiment towards the bottom right of the panel using Memento Tuxedo Black Ink. I took an A2 Lavender card base and ran this through my die cutting machine to emboss the SSS Medium Dots Stencil on to the front for some added detail. I then adhered the stamped panel on top with foam tape. To finish off, I added a few Lucy's Grape Jewels.
 

SUPPLIES:

Here are the links to what I have used on the card. Affiliate links are used on some products. This means that if you make a purchase after clicking on my link, I receive a small commission with no extra cost to you. I truly appreciate your support when using these links. Please click on the logo below the product to shop at your favourite store. Products marked with an asterisk (*) were kindly sent to me to use.
 
 
These stamps are really easy to line up. I usually have so much trouble with these kind of sets but I didn't even have to use a stamp positioner for this one! Thank you so much for visiting me today, I hope you have a great weekend!

15 September 2017

Studio Katia Fall & Winter Release Blog Hop

** This is my second post of the day, please see below for my Neat & Tangled Guest Designer post **
 
Hello there, today I am delighted to be taking part in the Studio Katia Fall & Winter Release Blog Hop. It is such a fun release!
 
 
My card and tag today use the fabulous Friends of Winter set, along with the coordinating dies. I have also used the fabulous new Dotted Shaker Tag #2 die. If you are following along in the hop, you should have arrived here from the Studio Katia Blog, but if you get lost along the way, I have the full list of participants below.
 

My first project uses the super cute Santa from the Friends of Winter set. I first stamped the Santa on to some white cardstock with Memento Tuxedo Black Ink. I then coloured the image with Copic Markers and cut him out using the coordinating die. I die cut the Dotted Shaker Tag #2 die also from white cardstock. I masked off the bottom of the tag and then blended Tumbled Glass Distress Ink above to create a soft background. Santa was then added on top with foam tape.
 
 
I took a white A2 card base and added a sheet of paper from the Doodlebug Swiss Dot Rainbow Petite Prints Paper Pad on top. I tied some Doodlebug Bettle Black Doodle Twine through the top of the tag and then added this on to the card with foam tape. I took the 'ho ho ho' sentiment from the set and stamped this on to a piece of black cardstock using Versamark Ink. I applied white embossing powder and then heat set. This was cut in to three pieces and added to the card with more foam tape.
 
SUPPLIES:
Here are the links to what I have used on the card. Affiliate links are used on some products. This means that if you make a purchase after clicking on my link, I receive a small commission with no extra cost to you. I truly appreciate your support when using these links. Please click on the logo below the product to shop at your favourite store. Products marked with an asterisk (*) were kindly sent to me to use.
 
 
COPIC MARKERS: Santa skin - E13, E11, E00, E0000, R20. Beard - W3, W1, W00. Outfit - R89, R37, R29, R27, R24. C2, C0. Belt, shoes and gloves - C10, C8, C7, C5, Y26.
 
For my next project, I thought I would make a tag. I couldn't resist the reindeer from the set, so I had to ink him up too!
 

I started off by stamping the reindeer using Memento Tuxedo Black Ink. I coloured him using Copic Markers and then cut him out using the coordinating die. I then took the Dotted Shaker Tag #2 Die and cut this from Bristol cardstock.
 
 
I added a mask to the bottom and then blended over Distress Inks in Broken China, Blueprint Sketch and Chipped Sapphire. I then sprizted the tag with water. Once dry, I added the reindeer with foam tape and then added on a few of the Snowflake Embellishments around the reindeer with Multi Medium Matte. They are so pretty! To finish off, I simply added some Beetle Black Doodle Twine through the top of the tag.
 
SUPPLIES:
Here are the links to what I have used on the card. Affiliate links are used on some products. This means that if you make a purchase after clicking on my link, I receive a small commission with no extra cost to you. I truly appreciate your support when using these links. Please click on the logo below the product to shop at your favourite store. Products marked with an asterisk (*) were kindly sent to me to use.
 
 
COPIC MARKERS: E59, E57, E55, E31, E51, E50, R00. Nose & Collar - R89, R37, R24, R14.


BLOG HOP:

Here are the full list of participants in the hop today:
 
Michelle - you are here


GIVEAWAY:

I am giving away a $35 CAD gift certificate to the Studio Katia Store. I will randomly choose a winner from the comments left on this post by 22nd September 2017 at 23.59 hrs BST. I will announce the winner on the 23rd September 2017. The giveaway is open worldwide.
 
The next person on the hop is the fabulous Erum. Thanks so much for visiting me today. I will be sharing some more cards using the wonderful release later in the month. I hope you have a great time on the rest of the hop!

Birthday Monkey

Hello there, I am delighted to be guest designing for Neat and Tangled this month. I will be sharing cards for the next three weeks on a Friday. My card today uses the super cute Wild Ones stamp set and coordinating Nice & Neat Dies. I just love that cute monkey!
 

I started off by stamping the monkey from the set in Memento Tuxedo Black Ink. the image was then coloured using Copic Markers (the colours I used are listed below the supplies section) and cut out using the coordinating dies.


I took a panel of Bristol cardstock, cut this using a SSS Stitched Rectangle die and blended over Distress Inks for a soft background. I used Broken China and Tumbled Glass for the sky and Twisted Citron and Mowed Lawn for the grass. I then flicked on a little water for some interest.
 
 
Once the piece was dry, I stamped the 'happy birthday' sentiment from the Big Top Birthday stamp set on to it using black ink. The panel was then adhered to an A2 white card base with foam tape. I adhered the monkey to the background piece, also with foam tape. To finish off I added a few sequins from the Mermaid Tail and Ocean Waves mixes. I then added a coating of shimmer pen and Glossy Accents to the balloon.
 
SUPPLIES:
Here are the links to what I have used on the card. Affiliate links are used on some products. This means that if you make a purchase after clicking on my link, I receive a small commission with no extra cost to you. I truly appreciate your support when using these links. Please click on the logo below the product to shop at your favourite store. Products marked with an asterisk (*) were kindly sent to me to use.
 
 
COPIC MARKERS: Monkey - E59, E57, E55, E53, E51, E50, R00. Balloon - V17, V15, V12, V01.
 
This is such a cute set and I cannot wait to use the other animals in it for more cards :) Thanks so much for visiting me today. For more inspiration using Neat and Tangled products, please visit their blog. I hope you have a great day!