28 February 2017

Combining Stencils with Stamped Images

Hello there, today I am over on the Hero Arts Blog sharing a card where I have combined a stencilled background with a focal image. When using stencils in the past I have tended to use them as a full background piece with maybe a sentiment. I wanted to try and use them in a different way today and use them as a softer background to a floral image.


COPIC MARKERS - Dahlia: V99, V28, V25. Leaves: YG67, YG63, YG61. Shadow: B93, B000, B0000, 0.

Please pop over to the Hero Arts Blog to see the card in full and for all of the supplies used. In case you are interested, I have listed the Copic Markers I have used here to colour the dahlia. Thanks so much for popping by today, I hope you have a great day!

27 February 2017

VIDEO | Card Making Haul - February 2017

Hello there, I am popping in this afternoon to share my card making haul for February with you. There isn't that much to share with you but I did go ahead and get a few of the new Distress Oxide Inks. So far, I really like them but I need to experiment with them a lot more!
 
 
I also got a couple of items from MFT (via Seven Hills Crafts) and some sequins from Little Things from Lucy's Cards. Here is a look at everything I got:


SUPPLIES:
Here are the links to what I have used on the card. Please click on the picture or wording to be taken to where I purchased it. Affiliate links may be used on some products. This means that if you make a purchase after clicking on my link, I receive a small commission with no extra cost to you. I truly appreciate your support when using these links.
 
 
Thank you so much for visiting me today. I hope you are having a great day!

25 February 2017

Let Yourself Grow

Hello there, I am back with my final projects using the new release by Kim Dellow for PaperArtsy. Today I have two tags to share using a combination of a few of the stamp sets, the stencils and Fresco Finish Paints.


For both of the tags, I started off by cutting two tags from white cardstock using an MFT Traditional Tag Stax Die. For the first tag, I ran the tag through my Cuttlebug and embossed it with the PS046 stencil. I then took some white cardstock and added layers of Fresco Finish Paints to it using a mini brayer. I used Blue Oyster, China, Limelight and Snowflake paints. The round flower images from the EKD06 stamp set were stamped over the top using Archival ink. These were then cut out and adhered to the tag with tape runner. the sentiment, from the older EKD01 set was stamped, cut out and added to the tag with foam tape. To finish off, I added an eyelet to the top of the tag, as well as some black floss.


For the second tag, I used the paints and brayer technique again but this time with the whole tag. The round flower images were stamped with Black Soot Archival Ink on top. I then took the background type image from the EKD05 set and stamped this using the China Fresco Finish Paint. I used the same sentiment as on the first and again, added this with foam tape. To finish off, I added a white eyelet to the top of the tag.
 

SUPPLIES:

Here are the links to what I have used on the card. Please click on the picture or wording to be taken to where I purchased it. Affiliate links are used on some products. This means that if you make a purchase after clicking on my link, I receive a small commission with no extra cost to you. I truly appreciate your support when using these links.


The first tag is more my normal style I guess, but I like how the second one came out too and I will definitely be using the brayer technique with the paints again. For more information on the release, please head over to the PaperArtsy Blog. I hope you have enjoyed seeing all my projects using it. Thanks so much for visiting me today. I hope you have a great weekend!

24 February 2017

Best Wishes Flower

Hello there, today I am back with another card using the amazing new release by Kim Dellow for PaperArtsy. Today I am using the gorgeous EKD05 and EKD06 stamp sets.


I took a apiece of white cardstock and first stamped the large flower from the EKD06 set on to it using Memento Tuxedo Black Ink. I then masked this off and stamped the leaves from the EKD05 set to look like they are behind the flower. The mask was removed the flower and leaves coloured using Copic Markers.

 
The panel was added to a 5.5x5.5" white card base with foam tape. The sentiment, from the PaperArtsy EM22 Stamp Set was stamped on to white cardstock with black ink and then cut out. This was added to the card with more foam tape. To finish off, I added little dots of Glossy Accents to the circles on the middle.
 

SUPPLIES:

Here are the links to what I have used on the card. Please click on the picture or wording to be taken to where I purchased it. Affiliate links are used on some products. This means that if you make a purchase after clicking on my link, I receive a small commission with no extra cost to you. I truly appreciate your support when using these links.


COPIC MARKERS: Leaves - YG06, YG01, YG00. Coral layers - R22, R21, R00. Pink layer - RV55, RV52. Yellow layer - Y15, Y13, Y02.
 
Aren't all of those details in the flower just gorgeous? I love Kim's drawing style. For more information on the set and the whole release please visit the PaperArtsy Blog. Thanks so much for visiting me today. I hope you will join me tomorrow for my final projects for PaperArtsy. Have a great day!

22 February 2017

Cakeabella 2.0

Hello there, today is my last Wonderful Wednesday with 
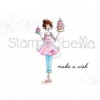
Stamping Bella for the month. When I first discovered Stamping Bella it was because of their Bella range. Back in the day they had stick arms and although I loved using the stamps, I am so happy that they have been 2.0'd. I took inspiration for my card today from one that I made with the original Cakeabella (you can see more on that below).
 

I started off by stamping Cakeabella using black ink on to a piece of white cardstock. I then cut this out using an MFT Pierced Circle die. I cut a piece off of the left side too. Cakeabella was then coloured using Copic Markers. I also added a few white highlights with a gelly roll pen.
 
 
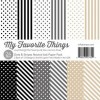
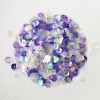
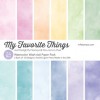
I took a piece of paper from the MFT Watercolor wash paper pad and cut this using a Hero Arts Rectangle die. I stamped the sentiment, from the Stamping Bella Tiny Townie Blossom Loves Balloons set, on to this with black ink. The panel was adhered to an A2 purple card base with tape runner. I then added the Bella piece on top with foam tape. To finish off, I added a few Doodlebug Glitter Sprinkles.
 

SUPPLIES:

Here are the links to what I have used on the card. Please click on the picture or wording to be taken to where I purchased it. Affiliate links are used on some products. This means that if you make a purchase after clicking on my link, I receive a small commission with no extra cost to you. I truly appreciate your support when using these links.


COPIC MARKERS: Skin - E13, E11, E00, E000, R20. Hair - E49, E29, E27, E25, E23. Jeans - B97, B95, B93. Tunic - BV13, BV11, BV02, BV01, BV000. Top - R11, R00, R000. Cakes - E33, E30, E31, R85, R83, R81, R37, R24, C3, C0. Background - B01, B00, B000, B0000, 0.
 
As I mentioned above, I took inspiration from a card I made back in 2007 (wow! doesn't time fly when you are having fun?!). I thought I would share the card here for you to see, no laughing now! ....
 
 
As you can see, I kept the colour scheme and also the general layout the same. I am happy to say that my card making skills have come on a bit in the last 10 years though! ;) You can see more inspiration using Stamping Bella stamps over on their blog. A big thank you goes to Em for having me guest design this month. It has been a dream come true! Thanks so much for visiting me today, I hope you have  a great day!
End of code